You can learn how to print on pencils at home without a commercial printing machine — it's more accessible than most people expect. The method you choose depends on what you already have, how many pencils you need, and how durable you want the finished result to be.
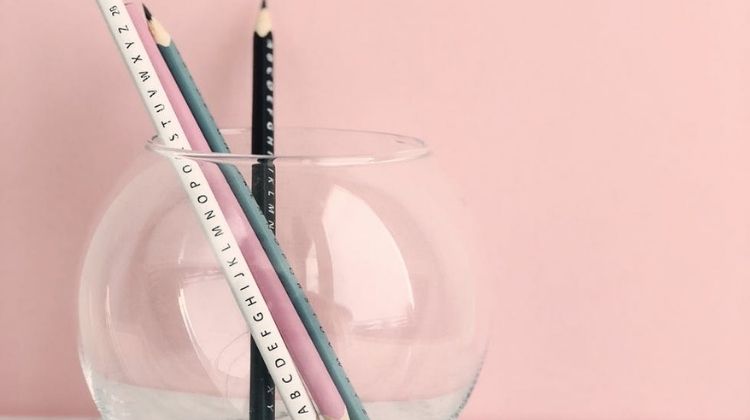
Printing on pencils is a small but satisfying craft that works for personalized gifts, branded giveaways, classroom supplies, and creative projects. You're not printing directly onto the pencil barrel with ink — instead, you're printing on an intermediate material (a label, transfer paper, or foil sheet) and then applying it to the pencil. Once you understand that distinction, everything clicks. If you've already experimented with printing on tricky surfaces — like iron-on transfer paper or ribbons with an inkjet printer — you'll recognize some familiar principles here.
This guide walks you through every approach: beginner-friendly to advanced, troubleshooting tips, common myths, and what actually gives you the best results. You'll also find a quick comparison table so you can pick the right method at a glance. For more creative printing ideas beyond pencils, browse our printing tips section.
Contents
When Printing on Pencils Makes Sense (and When It Doesn't)
Not every pencil project is worth the setup effort. Before you dive in, it helps to honestly assess whether printing on pencils is the right move for your situation.
Good Reasons to Print on Pencils
- Personalized gifts — weddings, birthdays, baby showers, graduations
- Branded promotional merchandise for a small business or Etsy shop
- Classroom supplies with student or teacher names
- Party favors and event giveaways in small batches
- Custom art supplies for creative professionals or gift sets
If you're making more than five pencils at a time, the setup pays off quickly. Batch production is where home pencil printing really shines.
Situations Where You Might Want to Skip It
- You only need one or two pencils — manual lettering may be faster
- The pencil has a dark or glossy surface with poor adhesion
- You need commercial-grade print durability for retail sale
- You don't have access to a laminator or heat press for foil methods
If you fall into the skip-it category, a professional pad printing service can handle small runs affordably without any equipment on your end.
Beginner Methods vs. Advanced Techniques
There's a clear skill ladder here. Start at the bottom and work your way up only if you need to.
Starting Simple — Shrink Wrap and Paper Labels
The most beginner-friendly approach to printing on pencils doesn't touch the pencil itself. You print a label on paper or label stock, then apply it.
- Design your label in any software — Canva, Word, or even Google Slides work fine
- Size it to wrap around the pencil barrel (typically about 6.5 inches long and 0.5–0.75 inches tall)
- Print on standard label paper or glossy sticker paper with any inkjet or laser printer
- Cut precisely along the edges — a paper trimmer gives you cleaner lines than scissors
- Peel and press the label onto the pencil, smoothing out any air bubbles as you go
- Seal with a coat of Mod Podge or clear spray for extra durability
This method works immediately with no new equipment. It's ideal for quick projects, parties, and anything where longevity isn't critical.
Stepping Up — Foil Transfer Sheets
Foil transfer printing gives you that classic engraved metallic look — the kind you see on commercial branded pencils. It uses heat to bond metallic foil directly to the pencil surface.
- Print your design in solid black using a laser printer only — inkjet toner won't work
- Set your printer to maximum toner density for a bold, solid output
- Place the foil transfer sheet shiny-side up over your printed design
- Run the pencil and foil through a hot laminator, or press with a heat press at around 300°F
- Peel the foil sheet back slowly at a 45-degree angle
The metallic finish looks genuinely professional. Gold and silver foils are the most popular, but you can find foil sheets in dozens of colors. The laser printer requirement is non-negotiable — the toner is what the foil bonds to under heat.
Advanced — Pad Printing
Pad printing is the commercial standard for pencil manufacturers. It uses a silicone pad to transfer ink from an engraved plate onto rounded surfaces like pencil barrels. The results are extremely durable and precise, but the equipment is expensive and has a steep learning curve. According to Wikipedia's overview of pad printing, the process was developed specifically to handle irregular and curved surfaces that other printing methods struggle with. For home use, stick with the label or foil methods. Pad printing makes sense only if you're running a production operation.
Pencil Printing Methods Compared
Here's a side-by-side look at the main options so you can choose what fits your setup and budget.
| Method | Printer Type Needed | Skill Level | Durability | Approximate Cost |
|---|---|---|---|---|
| Paper / label wrap | Any inkjet or laser | Beginner | Low | $ |
| Foil transfer (laminator) | Laser only | Intermediate | Medium | $$ |
| Foil transfer (heat press) | Laser only | Intermediate | Medium-High | $$ |
| Shrink wrap tube labels | Any inkjet or laser | Beginner | Medium | $$ |
| Sublimation printing | Sublimation printer only | Advanced | High | $$$ |
| Pad printing (machine) | Dedicated machine required | Professional | Very High | $$$$ |
Troubleshooting Common Problems
Even simple projects hit snags. Here's what to do when things don't go as planned.
The Foil Isn't Sticking
- Confirm you're using a laser printer — inkjet output will not hold foil
- Increase your printer's toner density setting to the maximum
- Run the pencil through the laminator a second time at full heat
- Make sure your laminator actually reaches the right temperature — cheap models often run cool
Labels Peeling Off
- Clean the pencil surface with isopropyl alcohol before applying anything — oils and dust cause poor adhesion
- Let the alcohol dry completely before pressing your label down
- Switch to a stronger adhesive label stock rated for cylindrical surfaces
- Seal finished labels with a clear coat spray — it locks the edges down
Ink Smearing or Blurring
- Let inkjet prints dry for at least five minutes before cutting or handling
- Use a quick-dry or pigment-based inkjet ink if smearing is a recurring issue
- Avoid touching the printed surface before the sealant cures fully
Uneven Foil Application
- Apply steady, even pressure — rolling the pencil slowly under the laminator helps distribute heat
- Use a silicone baking mat or folded craft foam as a cushion when using a hand iron
- Work on a hard, flat surface to ensure consistent contact between the foil and pencil barrel
Myths About Printing on Pencils
There's a lot of conflicting information online about this topic. Let's clear up the most common misconceptions.
Myth: You Need a Special Printer
You don't — at least not for most methods. Paper label and shrink wrap techniques work with any standard inkjet or laser printer you already own. The foil transfer method does require a laser printer specifically, but that's a machine many homes and offices already have. Only sublimation and pad printing require dedicated equipment that most home users won't own.
Myth: Home Results Always Look Cheap
With the right technique and quality materials, home-printed pencils can look remarkably polished. Gold and silver foil transfers in particular produce a metallic finish that rivals professional engraving. The difference between a good result and a cheap one usually comes down to prep work: clean surfaces, precise cuts, and smooth label application. Take your time on those steps and the output reflects it.
Myth: You Can Use Any Ink Directly on a Pencil
Standard inkjet or laser ink won't adhere directly to a lacquered pencil barrel. You're always printing onto an intermediate surface and then applying it to the pencil. Understanding this keeps your expectations realistic and your projects on track. If you've ever tried printing on unusual materials before — say, if you've read our guide on how to print on paper napkins — you'll recognize this same principle: the substrate matters enormously.
Tips and Tricks for Better Pencil Printing Results
These small adjustments make a noticeable difference in your finished product.
Prep Your Pencils First
- Wipe each pencil with a lint-free cloth and isopropyl alcohol
- Let them air dry fully — even a minute or two matters
- Remove any stickers or existing labels before you start
- Sort pencils by diameter if you're working with different brands — labels cut for one size won't always fit another
Design Tips for Small Surfaces
- Keep text at least 10pt font — smaller text becomes unreadable at pencil scale
- Use high contrast: dark text on a light background, or light text with a foil finish
- Avoid intricate fine-line illustrations — they lose detail at this scale
- Test print on regular paper first and wrap it around a pencil to check sizing before committing to label stock
Batch Smart
- Pre-cut all your labels or foil strips before starting — it keeps your workflow clean
- Work in batches of 10–20 pencils at a time for consistency
- Keep a soft brayer (a small roller) nearby to press labels flat evenly
- Label one test pencil first before running your full batch — catch any issues early
Finishing and Sealing
- For paper and label methods, seal with a clear matte or gloss spray coat
- For foil transfers, the foil layer itself is fairly durable — extra sealing is optional
- Store finished pencils flat and unbundled for at least an hour so adhesive sets fully
- Avoid rubber band storage — it can compress and distort fresh labels
Frequently Asked Questions
Can you use an inkjet printer to print directly on a pencil?
No — standard inkjet ink won't bond to a lacquered or painted pencil barrel. You always print on an intermediate material like label paper, shrink wrap, or foil transfer sheet, then apply that to the pencil. The inkjet printer itself works fine for label and shrink wrap methods, but foil transfer specifically requires a laser printer.
What type of paper works best for pencil labels?
Glossy or matte adhesive label paper works well for most inkjet and laser printers. For longer-lasting results, look for waterproof label paper — it resists handling and light moisture better than standard stock. If you want a writable surface on part of the label, choose a matte finish on that section.
How do you make printing on pencils last longer?
Prep the pencil surface with isopropyl alcohol before applying anything, use a strong adhesive label stock, and seal finished pencils with a clear coat spray. For foil transfers, the metallic layer itself holds up well to normal handling without extra sealing. Avoid wrapping rubber bands tightly around freshly labeled pencils.
Is it possible to print on mechanical pencils?
Yes, with some adjustments. Mechanical pencil barrels are typically plastic and narrower than wood pencils, which means you'll need to resize your labels accordingly. Clean the plastic surface thoroughly before applying labels — plastic can be oily from handling and adhesion is less reliable than on wood. Foil transfer on plastic also requires careful heat control to avoid warping.
Final Thoughts
Now that you know how to print on pencils using methods that match your skill level and equipment, the best next step is to pick one approach and run a small test batch — even five pencils will teach you more than any guide can. Start with the label method if you want immediate results, or grab a pack of foil transfer sheets if you're ready to step up the quality. Either way, your first batch will be your best teacher.



About Chris & Marry
Chris and Mary are a couple with a shared background in graphic design and print production who have spent years working with printers across creative and professional contexts — from art printing and photo output to label production and professional document work. Their combined experience evaluating printer performance, color accuracy, and paper handling across inkjet and laser platforms gives them a practical, hands-on perspective on what makes a printer worth buying. At ShopChrisAndMary, they cover printer reviews, buying guides, and recommendations for artists, photographers, and professional users.
Time to get FREE Gifts. Or latest Free printers here.
Disable Ad block to reveal all the info. Once done, hit a button below