My neighbor called me three days before her daughter's baby shower, nearly panicking — she'd ordered a custom cake topper online and tracking showed it stuck in a warehouse two states away. I told her to relax, grabbed my edible printer, and thirty minutes later we had a crisp full-color design pressed onto a frosting sheet and centered on a freshly iced cake. That experience made me realize just how valuable knowing how to use an edible printer can be — and how approachable it is once you understand the basics. Whether you're a home baker, a hobbyist, or building a small custom cake business, this guide covers every step from setup to finished product. For more specialty printing ideas, browse our printing tips section.
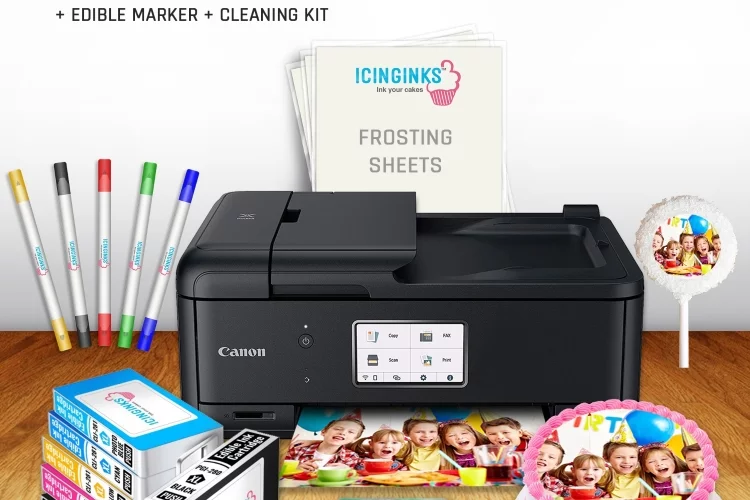
An edible printer is essentially a standard inkjet printer modified to use food-safe edible ink instead of regular ink. You load special edible media — frosting sheets, wafer paper, or rice paper — and it prints just like any document or photo. The ink and paper are made from FDA-approved food-grade ingredients, so everything that comes out is safe to eat. You can buy a dedicated edible printer pre-configured for cake decorating, or convert a compatible inkjet yourself using a food-safe ink kit.
Getting started feels intimidating at first — especially when you're looking at expensive edible supplies and wondering what to do first. But the process is simpler than it looks. This guide breaks it into five clear areas: getting your first print done quickly, choosing the right long-term setup, following best practices for consistent quality, exploring creative uses, and avoiding the most common mistakes. Read through before you start. Edible supplies cost more than regular paper, and early mistakes add up fast.
Contents
Getting Started: How to Use an Edible Printer for the First Time
The fastest way to learn is to do it. Your first print won't be flawless, but it will teach you more than reading alone ever could. Here's how to get there efficiently — without wasting your most expensive supplies in the process.
What You Need Before You Begin
Before you load a single sheet, gather everything on this list:
- An edible printer — either a dedicated unit or a converted inkjet (see next section for how to choose)
- Edible ink cartridges — must match your printer model exactly; never mix edible and regular ink in the same machine
- Frosting sheets or wafer paper — frosting sheets are the easiest starting point for most beginners
- Image editing software — Canva, Microsoft Word, or Adobe Photoshop all work well; free tools are fine for most jobs
- A clean, dry work surface — moisture is the enemy of edible media, and a damp counter can ruin a sheet before you even print
- Food-safe gloves or freshly washed, completely dry hands — natural oils from your fingers smear fresh edible ink
- A finished, ready-to-decorate cake or surface — have your buttercream or fondant surface prepped and ready before you print; don't let the sheet sit waiting
You don't need a professional setup or costly software. Most home bakers work comfortably with Canva and a mid-range dedicated edible printer. The key is having all your materials within reach before the sheet comes out of the printer. If you've ever worked with specialty print media like glossy photo paper, you already know the value of being fully prepared before printing — the handling window on delicate media is short.
Setting Up Your Printer Step by Step
Setup is the step most people rush — and the one that causes the most problems later. Take your time here.
- Dedicate the printer exclusively to edible use. Never switch between edible and regular ink in the same machine. Residual regular ink contaminates food products and is impossible to fully flush out.
- Install edible ink cartridges. Follow the same installation process as regular cartridges. Once installed, run a nozzle check page on plain paper to confirm all colors are firing correctly before touching edible media.
- Run a printhead cleaning cycle. Even brand-new printers benefit from one cleaning cycle before first use. Access this through your printer's utility software on your computer.
- Set your paper type and size. Most frosting sheets come in standard letter size (8.5" × 11"). Set this in your printer driver. If your printer has a paper type setting, choose "plain paper" — there is no dedicated edible paper setting on most models.
- Set print quality to "Best" or "High." Edible paper is less absorbent than regular paper. Higher quality settings deposit ink more carefully and reduce color bleeding.
- Load one sheet at a time. Edible sheets are fragile. Loading multiple sheets risks jamming, creasing, or double-feeding — all of which waste expensive media.
- Feed the sheet with the plastic backing face-down, printable side up. The printable side is the matte white or off-white frosting layer. The clear plastic backing protects it during feeding and is peeled away after printing.
Printing and Applying Your First Image
Keep your first design simple — a single photo or flat graphic works best while you're learning.
- Open your image in your editing software and resize it to fit within the printable area. Leave at least a quarter-inch margin on all sides to avoid the printer cropping your design.
- Boost image saturation by 10–20%. Edible inks typically print 15–25% less vivid than your screen shows. Compensating in advance gets you much closer to your intended colors.
- Do a test print on plain paper first at the exact same settings. Hold the test print up to a frosting sheet to check sizing before committing.
- Load your frosting sheet and print. Do not touch the printed surface afterward — let it rest flat for 3–5 minutes to allow ink to set.
- Have your cake ready and in front of you. Then peel the plastic backing from the sheet slowly, starting from one corner. Work gently and keep the sheet flat.
- Place the printed side face-down onto your frosting or fondant surface. Press from the center outward with clean, dry fingertips to remove air bubbles.
- Apply within 10–15 minutes of peeling. The longer you wait, the more brittle the sheet becomes — curling and cracking at the edges are signs it's drying out.
That's your first edible print done. The core of how to use an edible printer is right there — everything else is refinement and practice.
Choosing the Right Edible Printing Setup for Long-Term Use
If you plan to print regularly — for a baking hobby or a small business — your choice of printer and paper will determine whether the experience feels smooth or frustrating every single time.
Dedicated vs. Converted Printers
You have two main paths:
- Dedicated edible printers — models like the Kopykake edible printing system or Canon PIXMA-based edible units come pre-configured with food-safe ink. They're more expensive upfront but require no conversion work and come with support from the manufacturer.
- Converted inkjet printers — a standard Epson or Canon inkjet printer that you buy brand-new (never used with regular ink) and outfit with food-safe edible cartridges. This route is cheaper but requires careful sourcing of compatible cartridges.
The non-negotiable rule: never convert a printer that has already used regular ink. Regular ink residue is toxic and cannot be fully purged, even with extensive cleaning cycles. Always start with a fresh machine if you're converting.
Popular base models for conversion include the Canon PIXMA iP8720 and the Epson Artisan 1430. Both have wide carriage designs — useful for printing larger frosting sheets — and compatible food-safe cartridges are widely available for both. For most home bakers, a dedicated edible printer in the $150–$250 range is the most practical starting point.
Comparing Edible Paper Types
Not all edible media behaves the same way. Your paper choice affects how the print looks, how flexible the finished decoration is, and how it tastes. The table below breaks down the most common options:
| Edible Paper Type | Best Uses | Texture | Flexibility | Flavor Impact |
|---|---|---|---|---|
| Frosting Sheets | Flat cake toppers, cupcake discs, flat cookie prints | Smooth, slightly matte | Low — cracks if bent sharply | Mild, slightly sweet |
| Wafer Paper | 3D decorations, ruffles, butterflies, sculptural elements | Crisp, thin, paper-like | Medium — folds cleanly without cracking | Very neutral |
| Sugar Sheets | Stiff standing decorations, lettering, plaques | Firm, slightly glossy | Low — very rigid | Noticeably sweet |
| Rice Paper | Translucent effects, delicate floral decorations | Thin and delicate | High — very pliable when slightly moistened | Neutral |
| Chocolate Transfer Sheets | Chocolate bars, molded chocolate pieces | Smooth, film-like | Medium | Neutral (transfers to the chocolate surface) |
For most beginners, frosting sheets are the right choice to start. They feed through printers cleanly, accept ink evenly, and apply to buttercream or fondant without fuss. Once you're comfortable, wafer paper opens up a whole range of sculptural possibilities — it behaves somewhat like printing on thin specialty media such as paper napkins, where the substrate is delicate but surprisingly capable when handled correctly.
Best Practices for Clean, Vivid Edible Prints Every Time
Getting a passable edible print is easy. Getting a consistently great print takes a few extra habits that most guides skip over. These are the things that separate bakeries producing professional-looking results from home bakers who keep wondering why their colors look flat or their sheets keep cracking.
Color Settings and Image Preparation
Color management is the single biggest factor in print quality. Get this right and everything else falls into place:
- Use high-resolution images. Aim for at least 150 DPI (dots per inch — the measure of image sharpness) for standard-size cake toppers. Use 300 DPI for small, detail-heavy designs. Low-resolution images look pixelated and muddy when printed on food.
- Boost saturation before printing. Edible inks typically print 15–25% less vivid than your screen shows. Adding 10–20% saturation in your editing software compensates for this and brings colors much closer to what you're seeing on screen.
- Avoid heavy dark backgrounds. Designs with large dark areas require heavy ink coverage, which takes longer to dry and is far more prone to smearing when you handle or apply the sheet.
- Always do a test on plain paper first. This costs nothing and saves expensive supplies. Print at the exact same settings you'll use on the edible sheet, then hold the test next to your frosting sheet to confirm sizing and margins.
- Run a nozzle check weekly if you print regularly. Print the nozzle check pattern from your printer's utility software. If any color rows are missing or broken, run a cleaning cycle before printing on edible media.
Pro tip: If your edible prints are coming out with faint horizontal bands or streaks across the image, that's almost always a partially clogged printhead — run a cleaning cycle immediately and reprint the nozzle check before using another edible sheet.
Some edible printer brands also offer downloadable ICC color profiles for their ink systems. An ICC profile (a file that tells your software exactly how to send color data to your specific printer) can dramatically improve color accuracy, especially if you're matching brand colors or printing photographs. Check your ink manufacturer's website — these profiles are usually free to download.
Handling and Storing Edible Sheets
How you handle your media before and after printing directly affects your results. These habits prevent most of the frustration beginners encounter:
- Store sheets in their sealed packaging until the moment you're ready to load them. Exposure to air and humidity causes frosting sheets to curl, crack, or stick to themselves within hours.
- Work in a dry environment. Avoid printing near steam, an open dishwasher, or boiling pots. Even modest kitchen humidity can damage a sheet before it reaches the printer.
- Pick up printed sheets by the edges only. Never touch the printed surface, even after it looks dry. Fingerprint impressions show clearly on edible sheets.
- Apply to the cake within 30–60 minutes of printing. Edible sheets lose moisture quickly once removed from packaging. The longer you wait, the more brittle and crack-prone they become at the edges.
- Store decorated cakes in a box, not under plastic wrap. Plastic wrap pressed directly against a printed topper will smear the image. A loosely placed box top or dome keeps things covered without contact.
These handling rules will feel familiar if you've worked with other delicate printable media. Our guide on printing on iron-on transfer paper covers similar precautions — delicate print surfaces always reward patience and a clean workspace.
Creative Ways to Put Your Edible Printer to Work
Once you're comfortable with the fundamentals of how to use an edible printer, you'll quickly realize how wide the creative range is. This isn't just a tool for birthday cakes — it opens up a whole category of personalized food products that people are genuinely excited to buy and receive.
Cakes, Cookies, and Beyond
The most popular edible printing applications include:
- Birthday and celebration cakes — photo prints, logos, illustrated characters, or custom text placed directly on the top tier of a frosted cake
- Cupcake toppers — pre-cut circles printed with individual designs; each cupcake in a batch becomes uniquely personalized
- Sugar cookies — royal-iced flat cookies with printed images applied on top; a popular choice for event favors and corporate gifting
- Macarons — small, precisely sized prints applied to a white fondant disc placed on the shell
- Chocolate bars and truffles — chocolate transfer sheets let you print designs that transfer directly to the chocolate surface as it sets
- Lollipops — wafer paper prints sized to match the face of round candy lollipops
- Edible gift sets — printed cookies, cake pops, and chocolates packaged together as a cohesive gifting product
If you already enjoy other forms of specialty printing, edible printing will feel like a natural extension of your skills. The creativity involved — dealing with non-standard media, managing color carefully, thinking about how the final product is received — is similar to projects like printing custom half-fold greeting cards or producing waterproof stickers for product labeling. The substrate changes; the mindset doesn't.
Business and Professional Uses
Small baking businesses are using edible printers to:
- Offer custom cake toppers as an add-on service — design once, print on demand, charge a premium for personalization with minimal extra labor
- Produce branded corporate cookies for clients who want their logo on event food — a high-margin product with fast turnaround
- Create photo cakes at a fraction of the cost of ordering pre-printed toppers from a commercial supplier — typically $1–$2 per sheet versus $8–$15 per pre-made topper
- Offer same-day or next-day turnaround on custom orders that commercial printing services can't match
- Add consistent, professional quality to products that otherwise rely entirely on hand-piping or hand-painting skills
The startup investment is manageable. A complete mid-range edible printing setup — printer, starter ink set, and 50 frosting sheets — typically runs $200–$400. After that initial outlay, your per-print cost drops quickly with volume. If you're doing even a handful of custom cake orders per month, the printer pays for itself within a few weeks.
For those who already work with photo and image printing projects, edible printing is a logical creative expansion. Techniques like transferring photos to glass using transfer paper share the same underlying logic — different substrates absorb and hold ink differently, and understanding that relationship is what drives good results in both cases.
Common Mistakes That Ruin Edible Prints (and How to Skip Them)
Most edible printing failures trace back to a small set of repeated errors. Know these before you start and you'll avoid the frustration that trips up almost every beginner.
Ink and Paper Errors
- Mixing ink brands across cartridges. Different edible ink manufacturers use different chemical compositions. Mixing brands inside the same printer causes color shifts, unexpected clogs, and in some cases printhead damage. Pick one brand and stick with it across all cartridge colors.
- Using expired ink or outdated sheets. Edible ink has a shelf life, typically 6–12 months after opening. Expired ink separates inside the cartridge and prints unevenly. Outdated frosting sheets dry out, crack, and accept ink poorly. Always check expiration dates.
- Forgetting to prime the printer before use. If your printer has sat unused for more than a week, run a cleaning cycle and a nozzle check before loading edible media. Dried ink in the nozzles causes banding — those horizontal striped lines across your print.
- Using cheap, off-brand edible media. Bargain-priced frosting sheets absorb ink unevenly, curl easily, and crack under normal handling. Spend a little more on reputable brands. The quality difference is immediately noticeable.
- Setting print quality too low. Economy or "draft" print mode is not sufficient for edible media. Always select "Best" or "High Quality" in your printer driver. The difference in ink deposition is significant.
Understanding how ink interacts with specialty surfaces is a skill that carries over across many types of printing. Our guide on printing on clear sticker paper explores similar ink adhesion and saturation challenges — the core lesson is the same: the media you choose and how well you match it to your printer's output settings determines everything.
Application and Finishing Mistakes
A perfect print can still be ruined in the final step. These are the application mistakes worth knowing:
- Applying to crusted-over buttercream. If your buttercream has dried out or formed a surface crust, the frosting sheet won't adhere. Apply while the frosting surface is still slightly tacky, or lightly mist the surface with water and let it become just barely sticky before applying.
- Applying to fondant that's still wet. The opposite problem: wet fondant dissolves the edible sheet almost immediately. Let your fondant surface dry for 30–60 minutes before placing a print on it.
- Trapping air bubbles. Don't lay the sheet flat all at once. Instead, place the center first, then press gently outward toward the edges with clean fingertips. Working from the center out pushes air out rather than trapping it underneath.
- Waiting too long after peeling the backing. Once you peel the plastic backing, you have roughly 10–15 minutes before the sheet starts to dry and curl at the edges. Have your cake directly in front of you before you peel — don't peel and then prep the surface.
- Refrigerating cakes under plastic wrap. Condensation inside a cold fridge causes edible ink to bleed when plastic wrap is pressed against the print. Always store decorated cakes in a box rather than wrapped tightly.
- Skipping the surface prep on the cake itself. A beautiful print on a rough or uneven frosting surface will still look amateur. Use a bench scraper or cake smoother to get your frosting surface as flat and even as possible before applying anything. This takes two extra minutes and makes a dramatic visual difference.
Frequently Asked Questions
Can I use any inkjet printer for edible printing?
Not any printer — but many inkjet models can be converted. The critical rule is that the printer must be brand-new and never used with regular ink. Popular models for conversion include the Canon PIXMA iP8720 and the Epson Artisan 1430. Both have wide carriages and widely available food-safe replacement cartridges. Never attempt to convert a used printer, even if you've run multiple cleaning cycles — regular ink residue cannot be fully removed.
How long do edible prints last on a cake?
An edible print on a properly stored cake stays in good condition for 3–5 days. Keep the cake in a cool, dry place — ideally inside a covered box in the refrigerator. Avoid direct sunlight, high humidity, and plastic wrap pressed against the print surface. The image remains clear and vivid as long as moisture doesn't reach it directly.
Why does my edible print look faded or washed out?
The most common causes are a partially clogged printhead, print quality set too low, or using expired ink. Start by running a nozzle check print — if the test pattern shows missing rows or broken lines in any color, run a cleaning cycle and check again. Also verify your print settings are on "Best" or "High Quality" rather than draft mode. If the problem persists, your cartridges may be due for replacement.
Do edible prints change how the cake tastes?
In most cases, the flavor impact is minimal. Frosting sheets have a mild, slightly sweet taste; wafer paper and rice paper are nearly flavorless. The edible ink itself has no noticeable flavor. Most people eating a slice of cake with an edible topper don't detect any change in taste at all.
Can I print edible images at home without a dedicated edible printer?
Yes. You can convert a compatible new inkjet printer using food-safe edible cartridges, which are widely available online for popular models. Some local baking supply shops and grocery store bakery departments also offer edible printing as a paid service — a good option if you want to try the results before buying equipment. If you already own a home printer for other specialty tasks, you may also want to explore projects like printing greeting cards or waterproof stickers as complementary uses of your existing setup.
Once you understand how to use an edible printer — the setup, the paper, the small details that make prints stick and colors sing — the only real limit is what you can imagine on a cake.


About Chris & Marry
Chris and Mary are a couple with a shared background in graphic design and print production who have spent years working with printers across creative and professional contexts — from art printing and photo output to label production and professional document work. Their combined experience evaluating printer performance, color accuracy, and paper handling across inkjet and laser platforms gives them a practical, hands-on perspective on what makes a printer worth buying. At ShopChrisAndMary, they cover printer reviews, buying guides, and recommendations for artists, photographers, and professional users.
Time to get FREE Gifts. Or latest Free printers here.
Disable Ad block to reveal all the info. Once done, hit a button below