Have you ever pulled a sheet from your printer only to find smudges running across it, or watched paper jam for no obvious reason? Knowing how to clean printer rollers is the single most effective maintenance skill you can develop as a printer owner — and once you do it, you'll wonder why you waited so long. Dirty rollers are the leading cause of paper jams, skewed feeds, and ink smears, yet most people never touch them. Whether you print casual documents at home or high-resolution photos for your professional printing projects, clean rollers make a measurable difference every time you press print.
Printer rollers are the rubber cylinders inside your machine that grip each sheet of paper and pull it through during a print job. Over time, dust, paper fibers, and dried ink build up on their surface. As the rubber loses its grip, sheets start feeding crooked, jamming midway, or pulling through two pages at once. It's a mechanical problem with a straightforward solution — but most people have never opened the paper tray door to investigate.
This guide covers everything you need: the right supplies, a step-by-step cleaning walkthrough, an honest look at the costs, and habits that keep rollers clean for the long haul. If your printer has also been making unusual sounds, our guide on fixing a printer making a grinding noise is worth reading alongside this one — worn or dirty rollers are often the cause of those symptoms too.
Contents
Everything You Need to Get Started
Before you touch anything inside your printer, gather your supplies. Having everything within reach before you open the machine prevents you from losing track of small parts or leaving the rollers exposed longer than necessary.
The Basic Toolkit
You need surprisingly little for routine roller cleaning. The core supplies are lint-free microfiber cloths, isopropyl alcohol at 90% concentration or higher, cotton swabs for tight corners, and optionally a can of compressed air to clear loose dust first. That's it. Avoid paper towels entirely — they shed fibers that stick to the rubber and compound the problem. Never use acetone (nail polish remover) or bleach-based cleaners; both degrade rubber and dramatically shorten roller life.
Isopropyl alcohol is the key ingredient here. It dissolves ink residue and paper coating buildup without leaving behind water or chemical deposits that could damage the printer's internal components. You'll find it at any pharmacy, usually for under five dollars for a large bottle.
Advanced Tools for Stubborn Buildup
If your rollers feel hard and slick rather than soft and slightly tacky, you may need a dedicated rubber roller cleaning solution. These are sold by printer manufacturers and office supply stores for under fifteen dollars. A rubber conditioner — similar to what's used on automotive weatherstripping — can also restore flexibility to rollers that have become brittle from heat exposure.
For rollers behind rear access panels, some printers require a small Phillips-head screwdriver. Check your printer's manual before assuming everything is accessible from the paper tray alone. Knowing your model's layout ahead of time saves a frustrating mid-clean interruption.
Light Maintenance vs. a Full Deep Clean
Not every roller problem calls for the same effort. Understanding the difference between routine upkeep and a deeper intervention saves you time and prevents unnecessary disassembly.
Light Monthly Maintenance
If your printer feeds paper without issues but you notice faint smudging or small specks on output, a quick wipe is all you need. Pull the paper tray out completely and look at the rubber rollers visible in the opening. Press a lightly dampened microfiber cloth against each one and rotate it by hand a few times in the natural feed direction. This process takes about five minutes and should become a monthly habit if you print regularly — think of it the same way you think about cleaning a computer screen.
When to Go Deeper
A deeper clean is necessary when you experience repeated paper jams, multiple sheets feeding at once, or visible ink caked onto the rollers. At this level, you'll access rollers inside the printer body, often behind a rear service door or beneath a top-access panel. Some inkjet (ink-based liquid printing) printers include an automatic roller cleaning cycle in their settings menu, which runs a sheet through with extra pressure to scrub the surface. Laser (toner-based heat-fusion printing) printers rarely include this feature, but the manual process works just as well.
A deep clean every three to six months is a realistic schedule for anyone printing more than a few dozen pages per week. Light users — those printing once or twice a week — can usually stretch it to once or twice a year without issues.
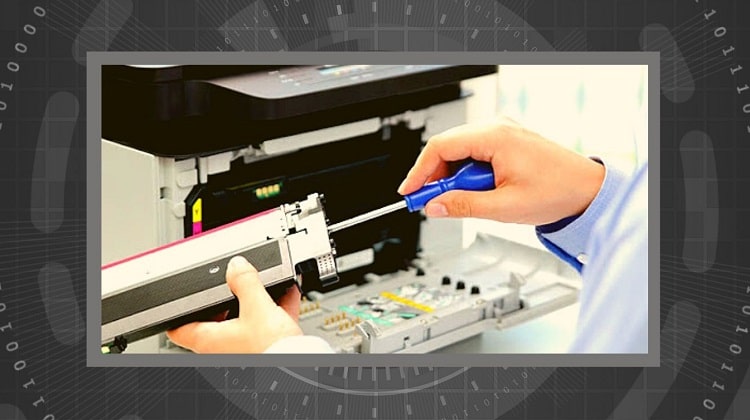
How to Clean Printer Rollers Step by Step
Here's a complete walkthrough that applies to most inkjet and laser printers on the market. Follow each step in order and don't rush the drying time.
Step 1 — Power Down and Open Up
Always turn off your printer and unplug it from the wall before reaching inside. This protects both you and the machine from electrical risk and prevents an accidental print job from starting mid-clean. Open the paper tray, remove all paper, and pull the tray out completely if it detaches. On most consumer printers, this gives you a clear view of the pickup roller — the one that grabs paper from the top of the stack. For feed and exit rollers deeper in the machine, open the rear access door if your model has one.
Step 2 — Clean the Rollers
Dampen a lint-free cloth with isopropyl alcohol. It should be moist, not dripping — if you squeeze the cloth and liquid runs out, it's too wet. Press the cloth firmly against the roller and rotate the roller by hand in the direction paper normally travels. You'll see gray or brown residue transfer to the cloth almost immediately. That's the buildup that's been causing your problems.
Use cotton swabs to reach the edges of each roller and any narrow gaps between the roller and its housing. Work methodically from one end to the other. Once the cloth comes away clean with no new residue, allow the roller to air-dry for two to three minutes before closing anything. Isopropyl alcohol evaporates quickly, so this wait is short but important.
Pro tip: Always rotate rollers in the natural feed direction during cleaning — spinning them backward can stress internal gear teeth and cause new mechanical problems.
Step 3 — Test and Confirm
Reload the paper tray with a fresh stack of paper, plug the printer back in, and power it on. Run two or three test pages. The first page may show slight residual smearing as loosened debris clears out. By the third page, output should be clean and sheets should feed straight without hesitation or drag.
If the problem persists after a thorough cleaning, the rollers may be worn past the point where cleaning helps. Roller replacement kits are available for most popular printer models and cost between ten and forty dollars. Replacing worn rollers is a straightforward repair that extends your printer's useful life significantly.
What You Gain — and What to Watch Out For
DIY roller cleaning is almost always worth doing, but there are real trade-offs to know before you start.
The Benefits
Cleaning your rollers at home costs almost nothing and extends your printer's life without requiring any technical expertise. A printer that jams repeatedly puts stress on the paper feed motor and internal drive components every time it tries to pull through a stuck sheet. Fix the root cause — dirty rollers — and you prevent cascading mechanical failures down the line.
There's also a direct quality benefit. Clean rollers feed paper consistently and straight, which improves print alignment on every page. If you've been getting crooked text or misaligned photos, clean rollers often resolve this without any driver updates or calibration adjustments. And if your printer is showing other unexplained behavior after cleaning, the troubleshooting guide on what to do when your computer recognizes your printer but it won't respond covers the next layer of diagnostics.
What to Watch Out For
The main risk is using too much liquid. Over-saturating the cloth allows alcohol to drip onto circuit boards or ink cartridge contacts, causing damage that costs far more to fix than the original jam. Use a barely-damp cloth, full stop. The other risk is forcing rollers to spin backward during cleaning. Rollers connect to a gear train, and rotating them in the wrong direction can strip small plastic teeth that are expensive or impossible to repair.
What Roller Cleaning Actually Costs
One of the most practical advantages of this maintenance task is how affordable it is. Here's an honest breakdown of what you can expect to spend.
Free vs. Paid Options
If you already have isopropyl alcohol and microfiber cloths at home — and most households do — your cost is genuinely zero. The only investment is fifteen minutes of your time. Many printer manufacturers also include a built-in roller cleaning utility in their desktop software. Running this costs nothing except a blank sheet of paper and is always worth trying before any hands-on cleaning. HP, Epson, Canon, and Brother all include this feature in their standard printer management tools.
| Item | Estimated Cost | Notes |
|---|---|---|
| Isopropyl alcohol (16 oz) | $3–$6 | Available at any pharmacy; 90%+ concentration required |
| Lint-free microfiber cloths (pack) | $5–$10 | Reusable indefinitely; do not substitute paper towels |
| Cotton swabs | $2–$4 | Standard household item |
| Rubber roller cleaning solution | $8–$15 | Only needed for heavy ink deposits or slick rollers |
| Compressed air can | $6–$10 | Optional; useful for clearing dust before wiping |
| Roller replacement kit | $10–$40 | Only if rollers are worn, cracked, or permanently hardened |
For printers under an extended warranty, check your coverage terms before performing internal maintenance. Most warranties permit routine cleaning, but it's worth a quick read to confirm before you open anything up.
Which Printers Need This Most?
Not all printers accumulate residue at the same rate. Your printing habits, the paper types you use, and your printer model all affect how quickly rollers degrade.
Inkjet printers used for photo output collect residue faster than standard document printers. Glossy and coated media — the kind used for photos, brochures, and labels — shed more surface material than plain copy paper. If you print on coated stock regularly, expect to clean rollers every two to three months rather than on a longer schedule.
Laser printers generally need less frequent attention because toner (dry powder fused to paper by heat) is far less messy than liquid ink. However, the fuser roller — the heated cylinder that bonds toner to the page — accumulates toner glaze over time. Accessible rollers can be spot-cleaned at home; fuser maintenance beyond that typically requires a technician.
Label printers, including direct thermal and thermal transfer models, are especially prone to adhesive buildup. Adhesive residue is tackier than paper dust and requires more passes to remove. Isopropyl alcohol handles it well, but plan for a slightly longer cleaning session. According to Wikipedia's overview of printer mechanics, feed rollers in high-volume machines are classified as consumable parts with defined replacement intervals — a clear indication of how central this component is to reliable operation.
Building a Cleaning Habit That Lasts
Knowing how to clean printer rollers is useful. Turning it into a regular habit is what actually keeps your printer running well for years without unexpected failures.
Prevention Tips
The single most effective prevention strategy is using quality paper. Cheap paper sheds more fibers and leaves more residue than mid-range or premium stock. If you print frequently, upgrading from bargain-bin reams to a decent brand can cut your cleaning frequency nearly in half — a real savings when you factor in the time each cleaning session takes.
Store your paper correctly. Paper left in humid environments absorbs moisture and becomes slightly sticky, which causes it to cling to rollers instead of gliding through cleanly. Keep unopened paper in its original packaging and store open reams in a sealed bag or box between uses.
Run a monthly test page and examine the output closely. Slight fading on one edge, a subtle curve to the feed direction, or tiny specks on an otherwise blank page are early signs that rollers need attention. Catching these signals early means a quick five-minute wipe handles it — not a thirty-minute deep clean with disassembly.
When to Call a Professional
If you've cleaned the rollers thoroughly and problems persist, or if the rollers feel hard, cracked, or visibly flattened, replacement is the right move. Rubber degrades with heat and repeated use — cleaning can only restore a surface that still has usable rubber underneath it. A qualified printer technician can replace standard consumer rollers in under an hour, and for most models the parts cost less than fifty dollars total.
For high-end professional printers, scheduling a maintenance visit once a year is a worthwhile investment. One service call costs a fraction of what printer replacement costs, and a technician will catch wear on components you can't easily see or access on your own.
Next Steps
- Open your paper tray right now and inspect the rollers — if they look gray, feel slick, or have visible ink deposits, schedule a cleaning today rather than waiting for the next jam.
- Gather your supplies: isopropyl alcohol at 90% concentration and a lint-free microfiber cloth are all you need to get started with a basic clean.
- Check your printer's software for a built-in roller cleaning utility — it's free, takes under two minutes, and is always worth running before any manual cleaning.
- Set a recurring monthly reminder to run a test page and inspect output quality; catching roller wear early keeps the fix simple and quick.
- If cleaning doesn't resolve persistent paper jams or smearing, search for a roller replacement kit specific to your printer model — replacing worn rollers is straightforward, affordable, and far cheaper than buying a new machine.


About Chris & Marry
Chris and Mary are a couple with a shared background in graphic design and print production who have spent years working with printers across creative and professional contexts — from art printing and photo output to label production and professional document work. Their combined experience evaluating printer performance, color accuracy, and paper handling across inkjet and laser platforms gives them a practical, hands-on perspective on what makes a printer worth buying. At ShopChrisAndMary, they cover printer reviews, buying guides, and recommendations for artists, photographers, and professional users.
Time to get FREE Gifts. Or latest Free printers here.
Disable Ad block to reveal all the info. Once done, hit a button below