You can print gold on black paper using one of three reliable methods: white toner transfer foiling, gold foil specialty media, or metallic inkjet paper. Each one works at home or in a small studio — no commercial print shop required. The technique you pick depends on your printer type, your budget, and how polished you need the finished piece to look. For a deep look at the printers that handle specialty media best, visit our printer for professionals resource hub.
Black paper absorbs light differently than white stock. Standard color inks — including most inks marketed as "gold" — are translucent, not opaque. Print them onto a dark background and they simply vanish. Every effective method for achieving gold on black either uses a physical foil that adheres to toner, a reflective substrate that gives the illusion of metallic color, or a two-pass technique that lays down an opaque white base before the gold layer goes on top.
Whether you're making wedding invitations, custom certificates, product packaging, or graphic art prints, understanding which approach suits your setup saves you time, money, and a lot of wasted card stock. This guide covers everything — real costs, equipment requirements, a full step-by-step foil transfer walkthrough, workflow systems for batching work, and how to protect your finished prints for the long term.
Contents
- What Printing Gold on Black Paper Actually Costs
- Tools and Equipment You Need to Get Started
- Fast Methods That Deliver Results Right Now
- How to Print Gold on Black Paper: Step-by-Step Foil Transfer
- Building a Consistent Gold-on-Black Printing Workflow
- How to Care for and Protect Your Gold Prints
- Frequently Asked Questions
- Next Steps
What Printing Gold on Black Paper Actually Costs
Cost is the first question most people ask, and the answer spans a wide range. You can get convincing results for under $30 on a single project, or invest a few hundred dollars in a setup that produces professional output consistently at scale. Here's how the numbers break down across three tiers.
Budget Options Under $30
These options work for one-off crafts, small batches, and experimentation. You don't need new hardware — just a few inexpensive supplies.
- Gold foil sticker paper — Pre-coated metallic sheets cost $8–$15 for a 10-pack. Compatible with most inkjet and laser printers. No laminator needed. Best for labels, stickers, and craft cards.
- DIY toner transfer foiling — You need gold foil roll ($5–$10) and a laminator ($15–$25 if you don't already own one). The laser printer you already have does the rest. Total startup stays under $30.
- Best fit for: greeting cards, party invitations, gift tags, digital scrapbook printing projects, and any one-time craft job.
Mid-Range Setup: $30–$150
This tier produces noticeably sharper results and handles a wider range of design work. Worth the investment if you're producing prints regularly.
- Metallic inkjet photo paper — Premium metallic sheets run $1–$3 per page. A 25-sheet pack costs $30–$60. The reflective coating creates a convincing gold effect when combined with warm-tone inks.
- Specialty gold pigment ink — Third-party gold ink cartridges for select Epson and Canon models cost $20–$50 each. More opaque than standard inks but still requires a light-colored or metallic-coated substrate.
- Best fit for: photographers, art print sellers, and album cover designers who need photographic-quality output with a metallic finish.
Professional Investment: $150 and Up
This tier is for anyone producing gold-on-black prints as a product or service. The upfront cost is higher, but the per-sheet cost drops and quality is consistently excellent.
- White toner laser printer — Entry-level models from Uninet iColor or OKI Color start at $200–$400. White toner prints directly onto black stock with full opacity, providing the most reliable foil adhesion base available.
- Dedicated foiling laminator — Purpose-built models designed specifically for foil transfer cost $80–$150. They produce sharper foil edges and more consistent heat distribution than standard pouch laminators.
- Best fit for: small print businesses, wedding stationers, packaging designers, and anyone producing 50+ gold prints per week.
| Method | Startup Cost | Est. Cost Per Sheet | Printer Required | Best Use Case |
|---|---|---|---|---|
| Gold foil sticker paper | $8–$15 | $0.80–$1.50 | Any inkjet or laser | Crafts, one-off labels |
| DIY toner transfer foiling | $20–$35 | $0.30–$0.80 | Laser printer required | Invitations, cards, certificates |
| Metallic inkjet paper | $30–$60 | $1.20–$2.50 | Inkjet (pigment ink preferred) | Art prints, photo products |
| White toner + foil laminator | $280–$550 | $0.50–$1.20 | White toner laser printer | High-volume professional work |
Tools and Equipment You Need to Get Started
Getting the right tools before you start prevents most of the frustrating failures people run into with gold foil printing. Here's a complete breakdown of what you actually need — and why each item matters.
Printer Requirements
Your printer choice determines which methods are available to you. Not every printer works for every approach.
- Standard laser printer — The workhorse of the foil transfer method. The toner functions as a heat-activated adhesive for the foil. Any laser printer works, but models with 600 dpi or higher resolution produce sharper foil edges on detailed designs.
- White toner laser printer — The professional benchmark. Brands like Uninet iColor, OKI C series, and Ricoh produce models capable of printing true opaque white toner onto black card stock. These are the printers used by specialty print shops for dark-background work of all kinds.
- Pigment inkjet printer — Required for the metallic inkjet paper method. Dye-based inks bleed and soak into coated metallic surfaces; pigment inks sit on top and produce sharper, more vibrant detail. Epson EcoTank Pro and Canon PIXMA Pro series are solid choices for this approach.
Media, Foil, and Finishing Supplies
- Black card stock (80–110 lb cover weight) — This is the standard range for invitations and certificates. Lighter paper warps under laminator heat; heavier stock may jam in home printers. Before buying in bulk, check our guide on how to measure paper thickness so you buy the right weight for your printer's feed system.
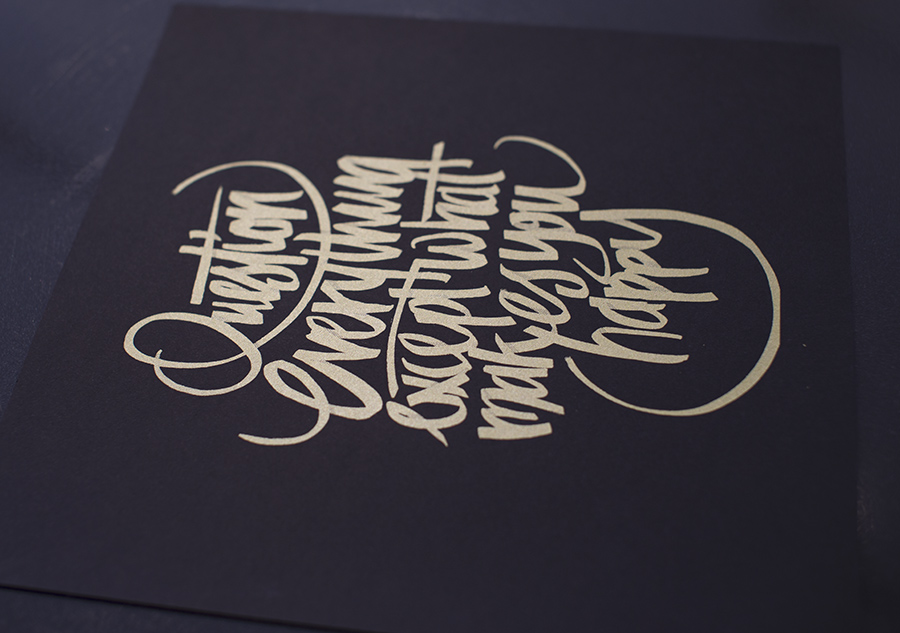
- Gold foil sheets or roll — Available in gloss, matte, and holographic finishes. Gloss gold foil against a black background creates the highest contrast and most striking visual effect. Buy a sampler pack first to test which finish works best with your laminator.
- Pouch laminator (5 mil setting) — A standard pouch laminator is sufficient for DIY foil transfers. You feed the foil-and-print sandwich directly — no pouch required. Slow, even feeding produces the best adhesion.
- Bone folder or hard brayer — Used to press foil firmly against the toner surface before it passes through the laminator, improving adhesion on fine details.
- Tweezers and cotton gloves — Tweezers let you peel foil cleanly without touching the print surface. Gloves prevent skin oil fingerprints on the finished foil.
Pro tip: Always run a laminator warm-up sheet through on plain paper before foiling your actual prints — laminator heat output is inconsistent in the first pass and can cause uneven adhesion on your first real sheet.
Fast Methods That Deliver Results Right Now
If you need gold-on-black output today without ordering special equipment, two approaches deliver results with what you likely already have or can pick up at a craft store this afternoon.
Gold Foil Sticker Paper
Gold foil sticker paper is coated with a thin metallic layer on one side. You print your design onto the coated surface and the printed areas appear with a metallic sheen. To create a gold-on-black effect, you design the file with a black background and let the foil coating provide the gold color for your text and graphics.
Here's the workflow:
- In your design software, set your canvas background to solid black (#000000).
- Set all text and graphic elements you want to appear gold to white or a very light cream. The foil coating handles the metallic appearance — the ink just defines the shape.
- Load gold foil sticker paper into your printer's manual feed slot, coated side up.
- Print at your highest quality setting.
- Allow inkjet prints 60 seconds to dry. Allow laser prints to cool fully before handling.
This method is ideal for labels, product packaging, gift tags, and short-run craft projects. If you already work with decorative printing, you'll recognize this workflow as similar to making custom decals with an inkjet printer — same principles, different substrate.
Metallic Inkjet Paper
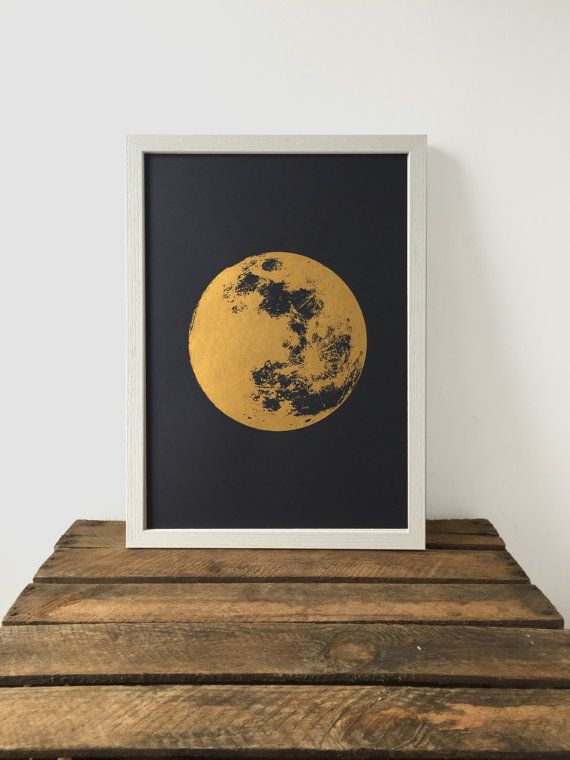
Metallic inkjet papers have a mirror-like coated surface. When you print warm-tone colors on them, the paper's reflective quality amplifies those tones into a convincing metallic gold appearance. This isn't physical foil — it's a combination of ink color and surface reflection that the eye reads as metallic.
- Use a pigment-ink inkjet printer. Dye inks bleed on the coated surface and produce muddy results.
- Set your background to solid black (#000000) in your design file.
- For gold text and graphics, use a warm gold tone — RGB 212, 175, 55 is a reliable starting point. Adjust from there based on your test prints.
- Always print on the coated side. If you're unsure which side is coated, run a fingertip lightly across each surface — the coated side feels slightly tacky or smooth compared to the matte back.
- This method produces photographic-quality metallic output — the best option for art prints, limited-edition prints, and high-resolution graphic work.
According to Wikipedia's article on metallic ink, the metallic appearance in consumer printing is created by pigment particles that reflect light in a directional way — actual gold particles are not used in any standard consumer or commercial ink formulation.
How to Print Gold on Black Paper: Step-by-Step Foil Transfer
The toner-transfer foiling method produces the most striking, professional-looking gold on black paper of any DIY approach. It requires a laser printer, gold foil sheets, and a laminator. Follow these steps exactly and you'll get clean, crisp gold output every time.
Step 1 — Prepare Your Design
- Open your design software — Adobe Illustrator, Canva, Affinity Designer, or even Microsoft Word works.
- Set your canvas background to solid black (#000000).
- Make all text and graphics you want to appear gold either white (RGB 255, 255, 255) or a very light gray. The toner is the adhesive — anywhere the toner lands, the foil sticks. The black background receives no toner and no foil.
- Use bold, clean typefaces. Thin strokes (under 1pt) lose definition at the foil edges. Anything you can read clearly in print at normal size will foil well.
- Export as a PDF or high-resolution JPG (300 dpi minimum). Vector PDFs produce the sharpest toner edges and therefore the sharpest foil lines.
Step 2 — Print the Toner Base Layer
- Load your black card stock into the laser printer's manual feed tray. Manual feed gives you more control over paper path and reduces jam risk with heavier stock.
- In your print settings, set quality to the highest available option and toner density to maximum. Heavy toner coverage means stronger foil adhesion.
- Print a test version on plain white paper first. Check that your text and graphics are positioned correctly and that margins are right before you commit to the card stock.
- Print your final design onto the black card stock. The white areas will print with a thick toner layer — this is your foil adhesive. Let the print cool completely. Minimum two minutes before touching it.
Step 3 — Apply the Gold Foil
- Cut a piece of gold foil sheet approximately 1 cm larger on all sides than your printed design area.
- Place the foil sheet face-up (shiny side facing you) directly on top of the toner layer. The dull backing of the foil faces down toward the toner.
- Feed the foil-and-print sandwich into your laminator without a pouch — just the paper and foil directly.
- Set your laminator to the 5 mil heat setting. If your model has a temperature dial, target 250°F–280°F. Too hot and the foil over-adheres to non-toner areas, creating a muddy effect; too cool and it won't stick at all.
- Feed slowly and evenly. Don't rush the pass — consistent heat contact across the full sheet gives you even foil transfer.
Step 4 — Peel and Finish
- While the sheet is still slightly warm from the laminator, peel the foil backing at a 45-degree angle. Slow and steady. Pulling too fast can lift gold from fine detail areas.
- Gold foil should remain only on the toner areas — your text and graphics — while peeling clean from the black background.
- Inspect edges. If detail areas look patchy, run the sheet through the laminator once more and re-peel. A second pass often picks up missed spots.
- Use a soft lint-free cloth to gently buff the foil surface. This smooths any micro-wrinkles and increases shine.
- Trim edges cleanly and handle all finished prints from the sides only to prevent fingerprints on the gold.
This technique works beautifully for a wide range of DIY printing projects — if you're already producing free printables at home, foil transfer is a straightforward upgrade that adds a premium finish with minimal extra effort.
Building a Consistent Gold-on-Black Printing Workflow
One great print is satisfying. A repeatable system that produces consistent results every single time is what separates a hobby from a professional operation. These practices eliminate variability and keep your gold output sharp batch after batch.
Design File Best Practices
- Save master design templates with your black canvas, locked font styles, and foil layer pre-configured. Swap only the content text between projects. This prevents you from accidentally altering settings that affect foil output.
- Use vector text, not rasterized text. Vectors scale to any print size without edge degradation. Rasterized text at 300 dpi looks fine at small sizes but loses definition on large-format prints.
- Create a separate "foil layer" in your design file and isolate all foil-intended elements there. This makes it easy to toggle visibility and proof the design in both foil and non-foil versions.
- Use a consistent three-stage proofing protocol: print on white paper to check composition, print on a single black card stock test sheet to verify toner density, then run your full batch. Never skip straight from design to production batch.
- Keep a log of your laminator settings — heat level, feed speed, and foil brand — for every project. When a batch comes out perfectly, you want to replicate those exact conditions next time.
Batching and Scaling Up
- Pre-cut all foil sheets before you start printing. Stopping mid-batch to cut foil interrupts your rhythm and cools your laminator unevenly.
- Run two to three warm-up sheets through the laminator on plain paper before starting your foil passes. This stabilizes heat output and prevents the first real print from getting inconsistent transfer.
- For batches over 30 sheets, let the laminator rest for five minutes every 25–30 passes. Consumer laminators are not rated for continuous commercial use, and overheating causes heat inconsistency that shows up as patchy foil.
- Stack finished prints face-up with a sheet of parchment paper between each layer. This prevents the gold surface of one print from scratching or sticking to the card stock of the next.
- If you're producing matching sets — for example, cards plus envelopes — run the envelopes in a separate pass after the main cards. Mixing media types mid-batch increases the risk of feed jams and alignment drift. For envelope-specific printing tips, our guide on how to print A7 envelopes covers feed setup and margin settings in detail.
How to Care for and Protect Your Gold Prints
Gold foil and metallic finishes are more delicate than standard ink-on-paper output. The metallic surface scratches, fingerprints easily, and can lift at the edges under the wrong storage conditions. These practices keep your prints looking sharp for the long term.
Handling and Storage
- Always handle prints from the edges only. Skin oils leave permanent smudge marks on foil surfaces that no amount of buffing removes completely. Use cotton gloves for any prints that will be displayed, framed, or shipped to clients.
- Store prints flat in acid-free folders or archival-quality sleeves. Stacking unprotected prints directly on top of each other causes gold-to-stock scratching even under light pressure.
- Keep finished prints away from direct sunlight. UV exposure gradually dulls the metallic sheen on both foil transfers and metallic inkjet prints. If a piece is going to be displayed long-term, frame it behind UV-filtering glass.
- Avoid high-humidity storage environments. Moisture causes black card stock to warp and can cause foil edges to lift and peel over time. A cool, dry room or a sealed flat storage box works well.
- If you're shipping prints, wrap each one individually in glassine paper before placing them in the envelope or mailer. Glassine is acid-free and won't stick to the foil surface the way regular tissue paper can.
Finishing and Sealing Options
Adding a protective finish to your gold prints extends their lifespan and adds a professional, polished look to the final product.
- Matte sealant spray — The most practical option for most users. Apply a very light, even coat from 12 inches away. Matte finishes protect without adding unwanted glare. Avoid gloss sprays on foil — they can react with the metallic surface and cloud it permanently.
- Cold lamination film — Applying a cold-process laminate over the finished print adds a durable protective layer without any heat that could warp card stock or disturb the foil. Available in matte, satin, and gloss finishes.
- Embossing powder layer — For extra dimension and tactile texture, dust heat-set embossing powder over the freshly foiled areas immediately after laminating while the toner is still slightly warm. This creates a raised, 3D gold effect on top of the flat foil base.
- If your finished prints are intended for product labels or outdoor use, make them fully waterproof before application. Our guide on how to make your labels waterproof walks through the most reliable methods for sealing labels against moisture and abrasion.
Frequently Asked Questions
Can a regular inkjet printer print gold on black paper?
Not directly. Standard inkjet ink is translucent and disappears against dark backgrounds. You can achieve a gold effect on black using gold foil sticker paper or metallic inkjet media, but the toner-transfer foiling method — which produces the most authentic gold look — requires a laser printer.
What paper weight should I use for gold foil printing on black card stock?
Use 80–110 lb cover weight card stock for most applications. Lighter paper warps under laminator heat. Heavier stock above 120 lb often doesn't feed reliably through home laser printers. Always check your printer's media specification sheet before buying card stock in bulk.
Do I need a special laminator for the foil transfer method?
A standard pouch laminator set to 5 mil handles most DIY foil transfers reliably. Purpose-built foiling laminators produce more consistent results and sharper foil edges, and they're worth the upgrade if you're printing foil designs regularly or at high volume. For occasional use, the basic laminator works fine.
Why is my gold foil not sticking to the toner?
The three most common causes are: insufficient heat (laminator hasn't reached operating temperature), toner density too low (increase it in your printer's settings), or feeding too fast through the laminator (slow down for full heat contact). Always run a warm-up sheet before your actual prints and verify your toner density is set to maximum.
Can I foil both sides of a black card stock sheet?
Yes, but you must work one side at a time. After foiling and cooling the first side completely — minimum five minutes — flip the sheet and run the second side through. Running double-sided in one pass risks heat-warping the card stock and smearing the toner on the first foiled side.
What design software works best for creating gold-on-black designs?
Adobe Illustrator is the professional standard for vector-based foil designs because it produces clean, scalable paths that translate directly to sharp toner edges. Canva Pro is a solid option for simpler designs and exports clean PDF files. Affinity Designer is an affordable Illustrator alternative with full vector support. Avoid raster-only editors like basic Photoshop workflows for text-heavy foil work — the rasterized edges produce noticeably softer foil lines.
Is white toner printing the same as gold foil printing?
No — they're different processes, but they work together. White toner printing lays an opaque white layer directly onto black paper, making the base visible regardless of paper color. Gold foil transfer uses that toner layer as an adhesive anchor for the metallic foil sheet. Combined, white toner plus foil produces the crispest, most professional gold-on-black results available outside of commercial offset printing.
How do I prevent fingerprints from ruining finished gold foil prints?
Handle all prints from the edges only, immediately after foiling. Once fully cooled, apply a light coat of matte sealant spray to seal the surface against oils and light abrasion. Use cotton gloves when working through batches or packing prints for shipping. Store finished pieces in glassine sleeves rather than standard plastic sleeves, which can create static and attract the foil surface.
Next Steps
- Choose your method based on your current printer: if you have a laser printer, start with the toner transfer foiling method; if you have an inkjet, order a pack of metallic inkjet paper and run a test batch this week.
- Run a full calibration test before committing to a large card stock order — print your design on white paper first, then on a single black test sheet, and document the exact toner density and laminator settings that give you clean foil adhesion.
- Set up a reusable design template in your software of choice with your black canvas, foil layer, and font styles locked in so you can launch new gold-on-black projects without rebuilding the file from scratch each time.
- Order a foil sample pack from at least two different brands — gloss, matte, and holographic — and test each with your specific laminator model. Record which combination gives you the best edge definition and write it down for future reference.
- Apply a matte sealant spray to your first finished batch and store pieces in glassine sleeves to confirm your handling and storage workflow before scaling up to larger production runs.


About Chris & Marry
Chris and Mary are a couple with a shared background in graphic design and print production who have spent years working with printers across creative and professional contexts — from art printing and photo output to label production and professional document work. Their combined experience evaluating printer performance, color accuracy, and paper handling across inkjet and laser platforms gives them a practical, hands-on perspective on what makes a printer worth buying. At ShopChrisAndMary, they cover printer reviews, buying guides, and recommendations for artists, photographers, and professional users.
Time to get FREE Gifts. Or latest Free printers here.
Disable Ad block to reveal all the info. Once done, hit a button below