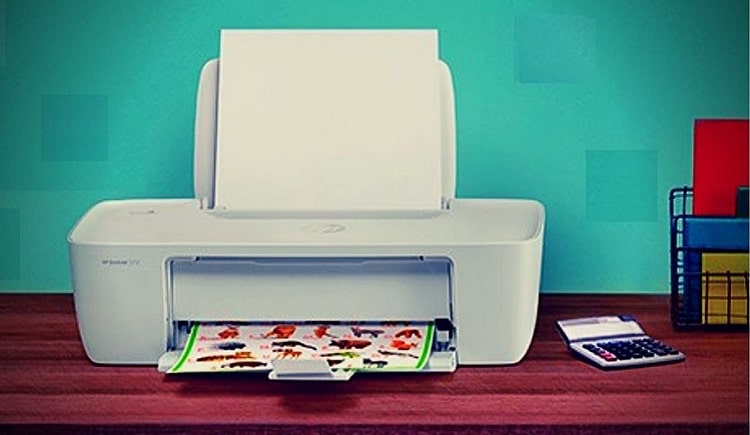
You can print index cards on an HP printer by setting your document size to match the card dimensions — 3×5, 4×6, or 5×8 inches — and feeding the cards through the manual or rear feed tray. Knowing how to print index cards on an HP machine eliminates the paper jams, ink smears, and misaligned text that trip up most first-timers. Your HP printer handles card stock without issue; you just need to configure it correctly before you send the job.
HP printers across the full product lineup — DeskJet, OfficeJet, ENVY, and LaserJet — support custom paper sizes through the printer driver. The logic is always the same: match the document dimensions to the physical card, select the right feed path for thicker media, and verify your paper type setting so the ink or toner bonds properly. Get those three variables right and every print lands clean.
If you've tackled other specialty printing tasks — like the steps in our guide on how to print half fold greeting cards — you already know that small-format jobs reward preparation. Index cards follow the same pattern. This guide walks you through the full process, compares size options side by side, breaks down real costs, and clears up the myths that waste your time.
Contents
- How to Print Index Cards on an HP Printer: Step-by-Step
- Index Card Sizes and HP Printer Settings at a Glance
- Index Cards in Action: What You Can Actually Print
- Mistakes That Ruin Your Index Card Print Jobs
- Index Card Printing Myths Worth Busting
- Fixing Index Card Printing Problems on HP Printers
- The Real Cost of Printing Index Cards at Home
- Frequently Asked Questions
- Next Steps
How to Print Index Cards on an HP Printer: Step-by-Step
This is the core process. Follow each stage in order and you'll get a clean first print without a wasted card.
Setting Up the Right Document Size
Before you touch the printer, set up your document to match your card size exactly. Open your file in Microsoft Word, Google Docs, or any design tool. Change the page dimensions to the card's physical size — 3×5 inches, 4×6 inches, or 5×8 inches. This step is non-negotiable. If your document stays at standard letter size, your content scales down and lands in the upper-left corner of the card.
- In Word: go to Layout → Size → More Paper Sizes and enter the custom dimensions.
- In Google Docs: go to File → Page Setup and enter width and height manually.
- In Canva or Adobe Express: create a new design with the exact card dimensions from the start.
Keep margins tight — 0.2 to 0.3 inches on all sides. Index cards don't give you much printable area, so padding wastes space you need for content.
Loading Index Cards Into Your HP Printer
Card stock is thicker than standard paper, and most HP printers have two paths: the standard main tray and a straight-through rear or manual feed slot. Use the manual feed or rear tray whenever possible. The standard tray routes paper through a curved path that can crease or jam heavier media.
- If your HP model has a rear feed slot, use it — paper travels straight through with minimal bending.
- Load one card at a time for first-run tests. Once you confirm alignment, load a small stack (no more than 10–15 cards).
- Adjust the paper guides snugly against the card edges. Loose guides cause skewed prints.
- Stack cards with the print side facing the correct direction — face down for most HP inkjet models, face up for rear manual feeds. Check your model's manual to confirm.
Sending the Print Job Correctly
In your print dialog, select the same paper size you set in the document. Then set the paper type to Card Stock, Heavy Paper, or the closest equivalent your HP driver offers. This adjusts ink flow and print speed so the result dries without smearing.
Always run a test print on plain paper first. Place the plain paper over your actual index card to preview where content lands. Once alignment looks right, load the card and print the real job. A single wasted card beats losing a full batch.
Index Card Sizes and HP Printer Settings at a Glance
HP printers support every standard index card size. The table below gives you the exact settings to use in your driver for each format.
Size and Setting Reference Table
| Card Size | Dimensions | Custom Size in Driver | Best Use | Feed Method |
|---|---|---|---|---|
| 3×5 Index Card | 3" × 5" | 3.00 × 5.00 in | Flashcards, vocabulary, quick notes | Manual / rear tray |
| 4×6 Index Card | 4" × 6" | 4.00 × 6.00 in (4x6 Photo preset) | Recipe cards, reference sheets | Manual / photo tray |
| 5×8 Index Card | 5" × 8" | 5.00 × 8.00 in | Presentations, detailed study cards | Manual tray (straight path) |
| A6 (metric) | 105 × 148mm | A6 preset or 4.13 × 5.83 in | International use, postcard-style | Manual / rear tray |
Choosing the Right Paper Type Setting
The paper type setting controls how much ink the printer lays down and how fast it moves through. Index cards sit between 90 lb and 110 lb cover weight — heavier than copy paper but lighter than true board stock. Select "Card Stock" or "Heavy" in the HP driver. If neither option appears, "Photo Paper" works as a reasonable substitute since it also slows the feed and increases ink saturation slightly.
Avoid leaving the setting on "Plain Paper." At that setting, the printer moves too fast, ink doesn't dry in time, and you end up with smearing every time.
Index Cards in Action: What You Can Actually Print
Index cards are more versatile than most people give them credit for. Once you know how to print index cards reliably, the range of useful applications opens up.
Study Flashcards and Reference Cards
The most common use is still flashcards. Printed cards beat handwritten ones for two reasons: you can pack more information per card with smaller, consistent fonts, and you can reprint the entire set instantly if cards get lost or damaged.
- Print the question on one side, answer on the other — use duplex printing if your HP supports it, or manually flip the stack after the first pass.
- Color-code by subject: print cards with a colored header bar in your template to distinguish topics at a glance.
- Add QR codes linking to additional resources — our guide on how to make a QR code for print walks you through that process.
Craft, Art, and Organizational Projects
Beyond studying, printed index cards serve creative and practical purposes at home and in the office. If you work on art and craft printing projects, index cards are a cost-effective alternative to specialty card blanks for tags, labels, gift enclosures, and mini art prints.
- Recipe cards with photos — print a dish photo on one side and the recipe on the reverse.
- Plant markers — laminate after printing for outdoor use.
- Business card prototypes — test layouts at 3×5 before committing to professional print runs.
- Event seating cards — 4×6 cards print formal table assignments cleanly.
- Project management cards — kanban-style task tracking with printed card templates.
According to Wikipedia's overview of index cards, the format has been in use since the 18th century — and printed versions maintain the same portability while adding the precision of digital layouts.
Mistakes That Ruin Your Index Card Print Jobs
Most failed index card prints come down to a handful of repeated errors. Avoid these and your results improve immediately.
Loading and Feed Path Errors
Feeding cards through the wrong tray is the most common mistake. Standard paper trays curve the paper path — index cards are stiff enough that this curve causes jams or diagonal misfeeds.
- Don't stack too many cards at once. Even in a manual tray, more than 20 cards creates feed pressure problems.
- Don't mix card stock and plain paper in the same tray during the same job.
- Don't ignore the guide rails. Cards that shift side-to-side during printing produce content that drifts off-center.
- Don't load cards immediately after removing them from a cold environment — let them reach room temperature first to avoid condensation issues on the surface.
Document-to-Card Size Mismatches
Setting the paper size in the print dialog without changing it in the document itself is a critical error. The print dialog size and the document page size must match. If they don't, HP's driver scales or crops the content to fit.
Always verify both settings before printing: the document canvas size in your editing software and the paper size in the HP print dialog. They need to be identical. This two-step check takes 10 seconds and prevents most alignment failures.
Index Card Printing Myths Worth Busting
Outdated advice and forum misinformation circulate about printing on index cards. Here's what's actually true.
Myth: HP Printers Can't Handle Thick Card Stock
This is false. Most HP inkjet and laser printers handle media up to 110 lb cover weight — the upper limit of standard index cards sits around 90 lb. The confusion comes from people using the wrong tray. When you route card stock through a curved standard tray, it jams. Route it through a straight rear path and the printer handles it without complaint.
HP's OfficeJet Pro and LaserJet lines specifically advertise support for heavy media. Even entry-level DeskJet models handle index card weight without hardware issues — the limitation is always the feed path, never the print mechanism itself.
Myth: You Need Special Third-Party Software
You don't need to buy any additional software to print index cards. Microsoft Word, Google Docs, LibreOffice, Canva, and Adobe Express all support custom page sizes. Any software that lets you set document dimensions works.
The HP Smart app — free on Windows, Mac, iOS, and Android — also handles custom print sizes directly. You don't need a specialized card-printing application. The tools you already have are sufficient for professional-quality results.
Fixing Index Card Printing Problems on HP Printers
When something goes wrong, the fix is usually straightforward. Here's how to diagnose and resolve the most common issues.
Paper Jams and Misfeeds
If your HP printer jams on index cards, work through this checklist in order:
- Confirm you're using the manual or rear feed tray, not the standard cassette.
- Check that guide rails are snug but not pinching the card edges.
- Reduce your stack size — try a single card first.
- Fan the card stack before loading to eliminate static cling between cards.
- Verify the card stock weight is within the printer's supported range (check the spec sheet for your model on HP's support site).
If jams continue after all of the above, run a printer self-test to rule out hardware issues. Our walkthrough on how to print a test page on an HP printer shows you exactly how to do this — it confirms whether the problem is paper-related or mechanical.
Ink Smearing and Poor Adhesion
Smearing usually means the ink hasn't dried before the card exits and contacts the output tray or the next card. Three causes account for almost all smearing:
- Wrong paper type setting — switch to Card Stock or Heavy Paper to slow the feed and reduce ink volume.
- Too much ink density — reduce print quality to Normal instead of Best; index card surfaces don't absorb as much ink as photo paper.
- Coated card stock — some index cards have a coating that resists inkjet ink. Switch to uncoated stock or use a laser printer for coated surfaces.
After printing, lay cards flat and allow at least 60 seconds of dry time before stacking. For high-ink designs or coated cards, wait three to five minutes.
The Real Cost of Printing Index Cards at Home
Home printing isn't always the cheapest option. Understanding the actual cost per card helps you decide when it makes sense.
Cost Per Card Breakdown
The cost to print an index card at home includes blank card cost, ink or toner cost, and the time to set up the job. Here's a realistic estimate:
- Blank index cards: $0.03–$0.06 per card for standard ruled 3×5 packs. Unruled white card stock is similar.
- Ink cost: A text-only card (black ink, standard quality) runs approximately $0.01–$0.03 per card on a mid-range HP inkjet. Color cards with graphics push this to $0.05–$0.12 per card.
- Laser printing: HP LaserJet toner costs drop the per-card ink cost to under $0.01 for text-only prints, making laser the better choice for large batches of text-heavy cards.
- Total cost per card: Roughly $0.04–$0.18 per card for home inkjet printing, depending on ink coverage and card stock quality.
When Buying Pre-Printed Cards Makes More Sense
For simple ruled flashcard sets, buying blank pre-ruled cards and writing on them costs the same or less than printing — and skips the setup entirely. Home printing earns its value when:
- You need custom layouts, logos, or color-coded designs.
- You're producing cards for an event, class, or professional presentation.
- You need to reprint the same card set multiple times.
- You want consistent formatting across hundreds of cards.
For high-volume batches — more than 500 cards with color graphics — a local print shop typically beats home printing on both cost and quality. For everything else, your HP printer delivers the control and flexibility that pre-printed options can't match.
Frequently Asked Questions
Can any HP printer print on index cards?
Most HP inkjet and laser printers support index card stock up to 90–110 lb cover weight. The key requirement is a straight or near-straight paper feed path — check your model's spec sheet for supported media weights. Entry-level DeskJet and OfficeJet models handle standard index card stock without issue when you use the manual or rear feed tray.
What size setting should I use for a standard 3×5 index card?
Set your document and print dialog to exactly 3.00 × 5.00 inches. In the HP driver, enter this as a custom paper size. If your software offers a 3×5 preset, use it — but always verify the dimensions are correct before printing.
Why does my HP printer keep jamming on index cards?
Jams almost always result from using the wrong tray. Standard paper cassettes curve the feed path, which stiff card stock resists. Switch to your printer's manual feed slot or rear tray for a straight paper path. Also reduce your stack to 10–15 cards maximum and make sure the guide rails are snug against the card edges.
Can I print on both sides of an index card?
Yes, but manual duplexing works better than automatic. Print the first side, let the ink dry for at least 60 seconds, then reload the card face-down (or face-up, depending on your model's flip orientation) to print the reverse. Auto-duplex on most HP models can smear wet ink from the first pass on thick stock.
Does the HP Smart app support printing on index cards?
Yes. The HP Smart app on Windows, Mac, iOS, and Android supports custom paper sizes. Set the size to match your card dimensions in the app's print settings before sending the job. It works the same way as printing from a desktop driver — you just access the size options through the app's print dialog instead.
Next Steps
- Open your document editor right now and create a new file sized to your card dimensions — 3×5, 4×6, or 5×8 inches — and save it as a reusable template.
- Run a single test print on plain paper, hold it over a blank index card against the light, and verify your content aligns correctly before loading any card stock.
- Switch your paper type setting in the HP driver to Card Stock or Heavy Paper and confirm you're using the manual or rear feed tray for this job.
- Print a batch of five cards first, check for smearing and alignment, then scale up to your full quantity once you're satisfied with the results.
- If you're using index cards for creative projects, explore our art and craft printer guides for ideas on color layouts, custom templates, and specialty media that pairs well with index card printing.


About Chris & Marry
Chris and Mary are a couple with a shared background in graphic design and print production who have spent years working with printers across creative and professional contexts — from art printing and photo output to label production and professional document work. Their combined experience evaluating printer performance, color accuracy, and paper handling across inkjet and laser platforms gives them a practical, hands-on perspective on what makes a printer worth buying. At ShopChrisAndMary, they cover printer reviews, buying guides, and recommendations for artists, photographers, and professional users.
Time to get FREE Gifts. Or latest Free printers here.
Disable Ad block to reveal all the info. Once done, hit a button below