To print half fold greeting cards at home, you need card stock within your printer's weight limits, the correct duplex orientation setting, and a test print before you touch your good paper. That's the whole process in one sentence. Once you understand those three variables, the results look polished and professional every time. If you're still choosing a machine for this kind of craft work, our art and craft printer category reviews the best options available.
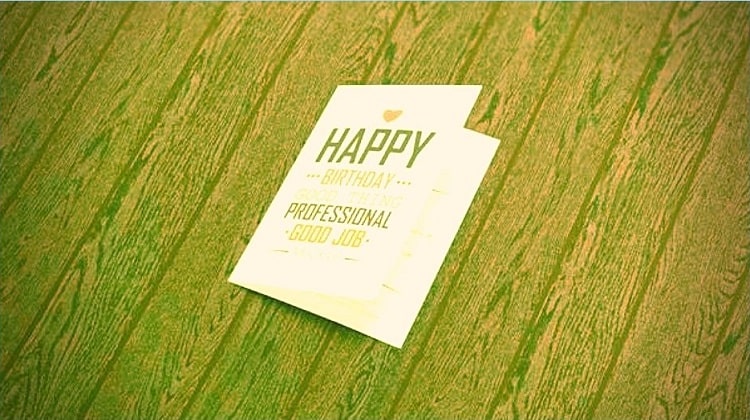
A half fold card is a single sheet folded once down the center, creating four panels — front cover, inside-left, inside-right, and back. The challenge isn't the folding itself. The challenge is getting your print layout to place each design element on the correct panel in the right orientation. Print the inside text upside down or put the cover art on the back panel and you've wasted a sheet of card stock. This guide fixes that problem before it happens.
You don't need a professional print shop or specialty equipment. A standard inkjet or laser printer handles half fold cards well when you configure it correctly. The steps and principles below apply whether you're using automatic duplex printing or flipping the paper manually for a second pass.
Contents
The Best Projects for Half Fold Greeting Cards
Occasions That Call for a Custom Card
Half fold cards work for nearly any occasion where a store-bought card feels generic. Birthdays, baby showers, weddings, and holiday greetings are the obvious applications, but the format is equally strong for thank-you notes, condolence cards, and business announcements. The advantage over a flat card is the extra real estate — four printable panels give you room for a long personal message, a photo collage, or a full illustrated design on the inside spread.
- Birthday and anniversary cards featuring a family photo inside
- Holiday cards mailed to clients or close friends
- Informal baby shower and wedding invitations
- Thank-you notes with a handwritten-style printed message
- Small event programs folded into a booklet format
- Personalized sympathy and get-well cards
Pairing Cards With Matching Envelopes
A standard half fold card measures 5.5 × 4.25 inches when folded from a half-letter sheet (5.5 × 8.5 inches). That size fits perfectly inside an A7 envelope, which is the industry standard for greeting cards. If you're mailing the cards, printing your own envelopes to match completes the professional look. Our guide to printing A7 envelopes walks through exactly how to set up the layout so your return address and recipient address land in the right positions every time.
Digital Templates and Free Designs
You don't need to design cards from scratch. Free half fold templates are available through Canva, Microsoft Word, and Adobe Express — all of them pre-sized and pre-formatted for home printing. Our guide on printing free printables at home covers how to download, scale, and print those files without distortion. For decorative backgrounds, patterned panels, and artistic inserts, the same techniques covered in printing digital scrapbook paper apply directly to card interiors.
If you want a coordinated set — cards, inserts, and decorative backing sheets — the layering and assembly techniques in our homemade scrapbook guide transfer naturally to greeting card projects.
Half Fold Card Myths You Need to Drop
You Need a Special Greeting Card Printer
This is the most persistent myth in home card making. You do not need a dedicated greeting card printer. Any inkjet or laser printer that accepts card stock — typically 65 lb cover weight or heavier — handles half fold cards without modification. What actually matters is the paper weight specification in your printer's manual and whether your paper tray can feed thicker sheets without double-feeding or jamming.
Specialty greeting card printers exist as a niche product category, but a mid-range photo inkjet from Canon, Epson, or HP produces results that match them for home-volume printing.
Duplex Printing Solves Everything
Automatic duplex is useful, but it doesn't eliminate setup thinking. Most duplex printers default to long-edge flipping, which works correctly for standard documents but puts the back panel of a half fold card upside down. You need to confirm whether your specific model flips on the long edge or the short edge, then change the binding setting in your print dialog to match your card's fold direction.
For a standard landscape-oriented half fold card, short-edge binding is typically the correct choice. Always confirm this with a plain-paper test draft before loading card stock.
Card Stock Always Jams
Card stock jams when you exceed your printer's rated paper weight or load it through the wrong feed path. Most modern inkjets handle up to 80 lb text (120 gsm) through the standard tray and up to 110 lb cover (200 gsm) through a manual bypass or rear straight-path slot. Feed heavy stock one sheet at a time through the bypass and nearly all jamming problems disappear.
Knowing your paper's exact weight removes the guesswork entirely. You can learn to measure paper thickness accurately so you always purchase stock that falls within your printer's specifications rather than guessing by feel.
Common Mistakes When You Print Half Fold Greeting Cards
Wrong Page Size in the Print Dialog
The most common error is a mismatch between the design's page size and the paper loaded in the tray. If you design on a full 8.5 × 11-inch canvas but load half-letter sheets, the printer either crops your design or scales it down — and the fold line ends up in the wrong place. Set the page size in both your design software and the printer's print dialog to match the actual paper in the tray before you send anything to print.
Skipping the Test Print
Always run at least one test print on plain copy paper before using card stock. Fold the plain sheet exactly as you would fold the finished card. Check that the front cover faces outward, the inside text reads correctly when the card is open, and the back panel isn't inverted. A single test print takes thirty seconds and saves an entire sheet of card stock.
Ignoring Color Profiles
Colors on your monitor look different from colors on paper, and the difference is more obvious on greeting cards than on documents. A slight color shift across the fold line looks unprofessional. Use the ICC color profile that matches your specific paper type — matte cardstock, glossy cardstock, or satin finish — in your printer driver settings. Most manufacturers provide free ICC profiles on their support pages for download.
If your output consistently looks flat or muddy after switching paper, our guide on making your printer print darker covers output density settings you can adjust before running a full card batch.
Using the Wrong Fold Direction
A portrait half fold card folds along the top so it opens vertically like a book. A landscape half fold card folds along the left side so it opens horizontally like a pamphlet. Your template's fold direction determines which panels carry which content — front, inside, and back. Confirm the fold axis in your template before printing. Getting it wrong means your front cover design prints on the inside panel.
| Paper Weight | Feed Method | Print Quality Setting | Best Use |
|---|---|---|---|
| 60–80 lb text (90–120 gsm) | Standard tray | Normal / Draft | Casual everyday cards, inside panel printing |
| 80–100 lb cover (135–170 gsm) | Standard tray, single sheet | High / Photo | Standard greeting cards, holiday cards |
| 100–110 lb cover (170–200 gsm) | Manual bypass / rear straight path | High / Photo | Premium photo cards, wedding announcements |
| Above 110 lb cover (200+ gsm) | Manual bypass only | High | Specialty thick cards — verify against printer specs |
When Home Printing Wins — and When It Doesn't
When to Print at Home
Home printing makes sense when you need speed, flexibility, or a personal element that a print shop can't deliver on short notice. It's the right choice in the following situations:
- You're printing fewer than 25–30 cards in a single batch
- You need the finished cards within hours, not days
- The design is highly personal — family photos, handwritten elements, custom messages
- You want to experiment with different card stocks or finishes
- Per-card cost matters — home printing beats retail pricing under roughly 20 cards
When to Order From a Print Shop
For large quantities, professional printing wins on both consistency and cost. Once you're printing more than 50 identical cards, the per-card price at an online print shop drops below what you'd spend on card stock and ink at home. Offset printing also delivers more consistent color across a large batch than any home inkjet or laser printer can match.
Consider ordering professionally when:
- You need more than 50 identical cards
- Color accuracy across the entire run is critical — wedding invitations, for example
- You want specialty finishes like embossing, foil stamping, or spot UV
- Your home printer doesn't support the card stock weight required by your design
Choosing the Right Printer for the Job
If you print half fold greeting cards regularly, a duplex inkjet photo printer is the most practical investment. It handles both sides automatically and produces accurate color on card stock without manual flipping. For cards that are mostly text or two-color designs, a laser printer is faster and more economical per page. Our best duplex laser printer guide reviews the top-rated models if you're ready to upgrade your setup.
According to Wikipedia's overview of international paper size standards, the half-letter sheet (5.5 × 8.5 inches) is derived from the North American letter standard and remains the most widely used substrate for home-printed half fold greeting cards.
Keeping Your Printer in Top Shape for Card Stock
Feed Rollers and Paper Path Cleaning
Card stock is harder on feed rollers than standard copy paper. The extra stiffness and weight accelerate rubber roller wear, and glossy card stock coatings leave residue in the paper path over time. Clean your feed rollers every two to three months if you print cards with any regularity. Use a lint-free cloth dampened with distilled water and wipe gently along the roller surface. Never use alcohol or household cleaning sprays unless your printer's manual explicitly approves them.
Print Head Maintenance
Inkjet print heads clog when the printer sits unused for extended periods. If you only print cards occasionally — a few times a year — run a nozzle check before each card session. Access the nozzle check through your printer's utility menu or control panel. If the test pattern shows gaps, streaks, or missing lines, run one cleaning cycle before loading your card stock. Printing on card stock with a partially clogged head wastes expensive paper and produces visible banding across the image.
Storage and Humidity
Card stock absorbs moisture from the air, which causes sheets to curl and warp during printing. Warped sheets feed unevenly and produce misaligned prints. Store unused card stock flat in a sealed plastic bag or resealable sleeve, away from windows and heat sources. In humid climates, stock left out for more than a week should sit in an air-conditioned space for a few hours before loading.
- Store card stock flat — never upright, never bowed under other paper
- Seal unused sheets in a plastic bag between printing sessions
- Fan the stack before loading to prevent multi-sheet feeding
- Let freshly printed cards rest flat for 10–15 minutes before scoring or folding
Frequently Asked Questions
What paper size do I use to print half fold greeting cards?
The most common setup is a half-letter sheet measuring 5.5 × 8.5 inches, which folds down to a 5.5 × 4.25-inch card. Some templates use a full 8.5 × 11-inch sheet folded to 8.5 × 5.5 inches for a larger card format. Check your template's canvas size first, then load paper that matches exactly.
Can I print half fold greeting cards on a regular home printer?
Yes. Any inkjet or laser printer that accepts card stock weight — typically 65 lb cover or heavier — handles half fold cards without any modifications. The key is using the correct feed tray and matching your print settings to the paper weight you're loading.
How do I stop card stock from jamming in my printer?
Feed heavy card stock one sheet at a time through the manual bypass tray or rear straight-path slot rather than stacking it in the main cassette. Check your printer's maximum paper weight specification and make sure your card stock falls within that range. Most jams happen when you exceed the rated weight or load multiple thick sheets at once.
Should I use inkjet or laser for printing greeting cards?
Inkjet is the better choice for photo-quality color cards because it produces richer gradients and more accurate skin tones on glossy or matte card stock. Laser is faster and more cost-effective for text-heavy or two-color designs. If you're printing full-bleed photo cards, use a dedicated inkjet photo printer.
What card stock weight works best for half fold greeting cards?
The sweet spot for most home printers is 80–100 lb cover stock (135–170 gsm). This weight is stiff enough to hold a clean fold, light enough to feed through standard trays, and produces sharp print quality on both inkjet and laser printers. Go heavier only if your printer explicitly supports it through the bypass tray.
How do I make sure the fold line lands in the correct place?
Design your card on a canvas that matches the unfolded paper size, with a clear center guide marking the fold line. In your design software, add a non-printing guide at the exact center. When you print, the fold line is simply the middle of the sheet — score it lightly with a bone folder and a ruler before folding to get a clean, crisp crease.
Final Thoughts
Printing half fold greeting cards at home is a genuinely rewarding skill once you get the setup right — and the setup is simpler than most people expect. Pick up a pack of 80–100 lb cover stock, run one plain-paper test print, confirm your duplex flip direction, and score the fold line before creasing. Start with a free template from Canva or Word, dial in your settings using the table above, and print your first batch today — the results will speak for themselves.


About Chris & Marry
Chris and Mary are a couple with a shared background in graphic design and print production who have spent years working with printers across creative and professional contexts — from art printing and photo output to label production and professional document work. Their combined experience evaluating printer performance, color accuracy, and paper handling across inkjet and laser platforms gives them a practical, hands-on perspective on what makes a printer worth buying. At ShopChrisAndMary, they cover printer reviews, buying guides, and recommendations for artists, photographers, and professional users.
Time to get FREE Gifts. Or latest Free printers here.
Disable Ad block to reveal all the info. Once done, hit a button below