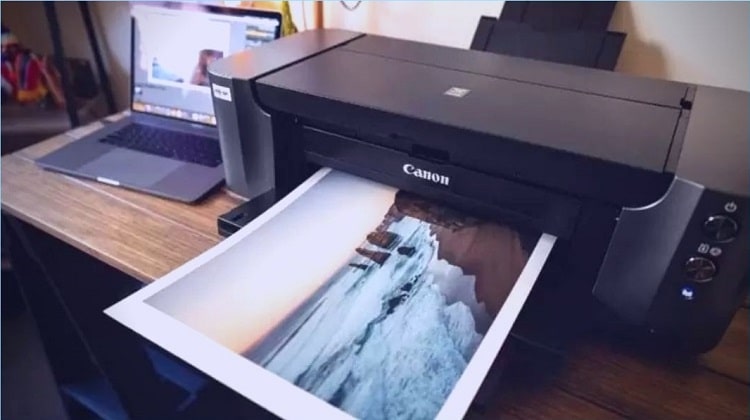
Ever wondered why your printed photos look flat and washed-out compared to the vivid, sharp prints you see at photo labs? The difference is almost always technique — specifically, knowing exactly how to print on glossy paper the right way. Get the paper, printer, and settings working together and you produce results that look genuinely professional. Get any one of them wrong and you waste expensive stock on smeared ink, tacky surfaces, or colors that bear no resemblance to your screen. Whether you're producing framed family photos, polished marketing materials, or vibrant output for your art and craft printer projects, this guide covers every step of the process.
Glossy paper is not simply regular paper with a shiny coating. It is engineered with a special polymer or clay surface layer that holds ink on top of the paper rather than letting it soak deep into the fibers. That's why colors look so saturated and edges look so sharp — and it's also why glossy paper reacts badly to the wrong ink type or incorrect printer settings. Understanding that core difference changes how you approach every print job.
According to Wikipedia's overview of photographic paper, glossy finishes have been the standard for high-contrast, color-accurate photo reproduction for decades. Modern inkjet photo papers build on that same chemistry. Once you understand how the coating works, every settings choice below makes complete sense.
Contents
When Glossy Paper Is the Right Call
Glossy paper is not the right choice for every print job — but when it fits, nothing else comes close. Knowing where it performs best helps you avoid wasting expensive stock on the wrong application.
Photo Printing and Framed Art
This is where glossy paper earns its reputation. Photos printed on glossy stock deliver:
- Richer, more saturated colors than matte or satin paper
- Higher contrast — blacks look deeper, whites look brighter
- Sharper edge definition on fine details like hair, foliage, and text overlays
- A professional finish that looks store-bought when framed under glass
If you're printing portraits, landscapes, or event photos you plan to display, glossy paper is almost always the correct choice. It handles smooth color gradients — skin tones, skies, water — better than any other consumer paper type. The coating holds color information at the surface, so nothing bleeds or diffuses into the fibers.
Marketing Materials and Presentations
Glossy paper makes product photos and promotional flyers look polished and expensive. Use it for:
- Product one-sheets where photo quality is a selling point
- Presentation handouts where you want a premium tactile feel
- Menu inserts, event programs, and branded cover pages
- Real estate flyers and portfolio prints
One important caveat: glossy paper is nearly impossible to write on with a ballpoint pen. If recipients need to annotate the document, use matte or semi-gloss (satin) instead. Glossy is the presentation finish, not the working document finish.
Crafts and DIY Projects
Crafters have discovered that glossy paper opens up a wide range of project possibilities. Common craft applications include:
- Printable stickers (pair with laminate film for waterproofing)
- Decoupage elements with vivid, durable color retention
- Scrapbooking photo inserts — the guide on how to print digital scrapbook paper easily covers related paper handling techniques worth reading alongside this one
- Trading card art, collector prints, and mini photo albums
- Iron-on transfer base layers (check the transfer paper manufacturer's instructions)
For specialty transparent surfaces, many of the same coating principles apply. If you are working with transparent film alongside glossy stock, the guide on how to print on clear sticker paper explains the crossover between glossy coating chemistry and transparency media behavior.
Inkjet vs. Laser: Which Printer Works Best on Glossy Paper?
The single most important hardware decision you will make is your printer type. Not all printers handle glossy paper equally — and one type can actively damage both the paper and the machine if mismatched.
Why Inkjet Dominates
Inkjet printers are the go-to choice for glossy paper, and for good reason:
- Dye-based inks absorb into the glossy coating at a molecular level, locking vivid color in place
- Pigment-based inks sit on top of the coating, producing sharper text and longer archival life
- Most photo inkjets come factory-calibrated for glossy media out of the box
- ICC profiles (color matching profiles that ensure on-screen color matches printed color) are widely available for all major glossy paper brands
Dye ink is best for photos and artwork; pigment ink is best for documents and archival prints. Most consumer photo printers ship with dye ink by default. Professional and wide-format machines typically use pigment.
When Laser Can Work
Laser printers bond toner to paper using heat and pressure in a component called the fuser. Standard glossy photo paper — the kind you buy for inkjet — melts or warps inside a laser fuser, destroying the print and potentially coating the roller with residue that takes dozens of pages to clear. However, laser-compatible glossy papers are specifically engineered to withstand fuser temperatures. They produce acceptable results for marketing documents but fall well short of inkjet photo quality for color-rich imagery.
Use the comparison table below to decide which route fits your needs:
| Factor | Inkjet on Glossy Photo Paper | Laser on Laser-Compatible Glossy |
|---|---|---|
| Photo color quality | Excellent | Moderate |
| Text sharpness | Good | Excellent |
| Drying / curing time | 2–5 minutes (ink cure) | Instant (heat fused) |
| Typical paper cost (letter sheet) | $0.25–$1.50 | $0.30–$2.00 |
| Risk of paper damage | Low — no heat involved | High if wrong paper type is loaded |
| Best use case | Photos, art prints, crafts, portfolios | Flyers, brochures, text-heavy marketing |
| Fingerprint resistance | Low — surface stays slightly soft | Moderate — toner is more stable |
Debunking the Biggest Myths About Glossy Paper
A lot of bad advice circulates about glossy paper printing. Here are the three myths that waste the most time and money for home users.
Myth: Any Printer Works Fine on Glossy Paper
Absolutely not. Using standard inkjet glossy paper in a laser printer causes the polymer coating to melt onto the fuser roller. This damages your printer and produces a ruined print. Laser-compatible glossy paper and inkjet glossy paper are not interchangeable — they look similar in the package but behave completely differently under heat. Always check your paper packaging for the printer type it supports before loading.
Myth: Glossy Always Looks Better Than Matte
Glossy looks better than matte for photos viewed in controlled, even lighting. But in bright overhead fluorescent light or near windows, glossy creates harsh reflective glare that makes the print nearly unreadable. This is why professional photographers printing for gallery walls frequently choose satin or luster finishes — they want color accuracy without the mirror-like glare of full gloss. Glossy is the right tool for the right context, not a universal upgrade over every other finish.
Myth: Glossy Ink Dries Instantly Once It Exits the Printer
It does not. Inkjet ink on glossy paper sits on the surface coating rather than absorbing into the paper fibers. That surface layer slows the curing process. Touching a fresh print, stacking prints immediately, or sliding them into a sleeve too soon results in fingerprints, scratches, and smear marks that are permanently bonded to the surface. Give every print at least 2–5 minutes before any handling — longer for high ink-density images with large dark areas.
Pro tip: Always run a test print on plain paper first to confirm your layout and colors before committing an entire pack of expensive glossy stock to a full batch.
Breaking Down the Real Cost of Glossy Printing
Glossy paper costs more than plain paper — but the range is wide depending on quality level, paper weight, and where you buy. Here's how to think through the numbers honestly.
Paper Costs
Glossy photo paper prices vary significantly by brand, weight, and finish type:
- Budget glossy paper (generic or off-brand): $0.08–$0.20 per 4×6 sheet
- Mid-range glossy paper (Canon, Epson, HP branded): $0.25–$0.60 per 4×6 sheet
- Pro-grade glossy paper (Hahnemühle, Ilford, Red River): $0.80–$2.00+ per sheet
- Large-format sheets (8.5×11 letter or A4): $0.50–$3.00 depending on weight and brand
Paper weight — measured in grams per square meter (gsm) — is a reliable quality indicator. Standard glossy photo paper runs 180–200 gsm. Professional papers start at 230–280 gsm and feel noticeably thicker and more rigid in hand. For prints you plan to frame, gift, or sell, go 200 gsm minimum.
Ink Costs
Ink is often the larger ongoing cost in home photo printing. Glossy prints use more ink than plain-paper prints because the surface coating allows the printer to lay down denser color without lateral bleeding. Typical ink cost per 4×6 photo on a consumer inkjet runs $0.10–$0.40 per print depending on image coverage and cartridge efficiency. High-yield cartridges bring the per-page cost down significantly. Third-party inks can reduce costs further — but always test compatibility with your specific glossy paper before committing to a full batch, because some off-brand inks bead on certain coatings instead of absorbing cleanly.
Home Printing vs. Photo Lab
For occasional one-off prints, a local photo lab often wins on pure cost. A 4×6 print at Walgreens, Costco, or CVS typically runs $0.15–$0.35, and the equipment is professionally calibrated for consistent color. Home printing becomes cost-competitive when:
- You print in volume — roughly 50 or more prints per month
- You need full creative control over color profiles and paper choice
- You're printing non-standard sizes or specialty paper types the lab won't accept
- You need prints in minutes rather than hours or days
- You're producing work for clients who require exact color accuracy
Mistakes That Wreck Your Glossy Prints
Most failed glossy prints trace back to the same handful of preventable errors. Eliminate these and your results improve immediately without any new equipment.
Wrong Printer Settings
This is the single most common cause of poor glossy output. The settings errors that cause the most damage:
- Media type left on "Plain Paper." The printer reduces ink volume and disables high-quality color processing. Change it to "Glossy Photo Paper" or the closest matching option in your driver before every glossy print job.
- Print quality set to Draft or Normal. Use "High" or "Best" for photo output. It prints slower. It is worth every extra second.
- Double color management. If you manage color in Photoshop or Lightroom with an ICC profile, set the printer driver to "No Color Adjustment" or "Application Manages Colors." Running both simultaneously causes a double color correction that blows out hues and crushes shadows.
- Wrong paper size selected. If your driver setting doesn't match the paper loaded in the tray, the printer either clips the edges or fails to print at all.
- Loading paper upside down. Glossy paper is coated on one side only. The wrong side produces a dull, blurry, water-logged print. Run your finger across both sides — the coated side feels smooth and slightly cool; the uncoated back feels like regular paper.
Poor Handling and Storage
Even a technically perfect print can be ruined after it leaves the printer tray. Avoid these common handling mistakes:
- Touching the printed face immediately — skin oils bond to wet ink and leave permanent fingerprints
- Stacking prints face-to-face before they're fully dry — the coating can fuse sheets together and tear when separated
- Storing in direct sunlight without UV protection — dye-based inks fade visibly within weeks of unprotected UV exposure
- Using standard plastic bags for storage — trapped humidity causes the coating to soften and stick to the bag surface
- Bending or rolling glossy prints — the coating cracks along the crease permanently
How to Print on Glossy Paper Like a Pro
Once you've eliminated the basic mistakes above, these techniques push your output to the next level. Each one comes from real print-shop experience — not theory.
Nail Your Driver Settings Every Time
Build a consistent workflow by saving your optimal glossy paper settings as a named custom preset in your printer driver. That way you never accidentally print a batch on "Draft / Plain Paper" settings. Your baseline preset for glossy photo printing:
- Media type: Glossy Photo Paper (or your printer's closest equivalent label)
- Print quality: High or Best
- Color mode: Color — even for black-and-white photos. Using all ink channels produces richer, more neutral blacks than single-channel grayscale on glossy paper.
- Paper size: Match exactly to your loaded stock — no approximations
- Color management: Printer manages colors for point-and-shoot simplicity; Application manages colors when using Lightroom or Photoshop with a paper-specific ICC profile
Choose the Right Glossy Paper for the Job
Not all glossy papers perform equally, even at similar price points. The variables that actually matter:
- Weight (gsm): Use 200+ gsm for prints you'll frame, gift, or show to clients. 180 gsm is fine for casual home prints and reference copies.
- Finish subtype: High-gloss for maximum color vibrancy in interior display; semi-gloss (satin or luster) for reduced fingerprinting, reduced glare, and a more gallery-appropriate look
- Brand matching: Epson paper in an Epson printer, Canon paper in a Canon printer — each brand calibrates their glossy coating specifically to their own ink chemistry. Mixing brands works, but brand-matched combinations nearly always produce better results out of the box.
- Coating type: Resin-coated (RC) paper is more water-resistant and durable than fiber-based paper. Choose RC for prints that will be handled frequently or displayed in humid environments.
Handle and Store Prints Correctly
Your print is most vulnerable in the first few minutes after it exits the printer. Follow this sequence every time:
- Let the print land on a clean, flat surface — do not catch it or pull it mid-exit from the tray
- Wait a minimum of 2 minutes before touching the printed face; wait 5 minutes for dense, high-coverage images with large dark areas
- Handle prints by the edges only, or wear lint-free cotton gloves for archival or client work
- Store finished prints in acid-free photo sleeves or a photo box — never in standard plastic zip bags that trap humidity and can soften the coating
- For long-term wall display, frame behind UV-protective glass or acrylic to prevent ink fading
- If you're shipping prints, interleave with glassine paper — not tissue paper, which can stick to the glossy surface
Frequently Asked Questions
Can I use any inkjet glossy paper in any inkjet printer?
Most inkjet printers accept standard glossy photo paper, but check your printer's manual for maximum supported paper weight (gsm). Some budget inkjets limit input to 200 gsm — thicker professional-grade papers at 250–280 gsm can cause feed jams or roller marks. Always use glossy paper explicitly labeled for inkjet use, not laser. The two product types look similar in packaging but behave completely differently.
Why does my glossy print look dull and grainy instead of vivid?
The most common cause is the media type setting in your printer driver. If it remains set to "Plain Paper," the printer applies less ink and skips high-quality color processing, producing a washed-out result on glossy stock. Change the media type to "Glossy Photo Paper" and reprint. If the output is still dull, verify that you loaded the paper with the coated side facing the print heads — the uncoated back produces exactly the flat, blurry look you're describing.
How long should I wait before handling a freshly printed glossy photo?
Wait at least 2 minutes for standard coverage prints and 5 minutes for high-ink-density images with large dark areas. Full chemical curing of dye-based inkjet ink on glossy paper takes 30 minutes to an hour — that's when the ink is completely stable and resistant to smearing under light pressure. Pigment-based inks reach handling stability faster, typically within 5–10 minutes. Do not stack, sleeve, or frame prints before they are fully dry.
What is the difference between glossy, satin, and luster photo paper?
Glossy has the highest shine level, delivering maximum color saturation and contrast — but it shows fingerprints easily and creates noticeable glare under direct lighting. Satin (also called semi-gloss) has a moderate sheen with less reflective glare and better fingerprint resistance. Luster has a fine pebbly texture that hides fingerprints almost completely and eliminates most glare; it is the preferred finish among professional portrait photographers for exactly that reason. All three accept inkjet ink well — the choice comes down to your display environment and how much handling the print will receive.
Can I print on glossy paper with a laser printer?
Yes, but only with paper specifically labeled as laser-compatible glossy. Standard inkjet glossy paper will melt onto the fuser roller inside a laser printer, ruining the print and potentially requiring an expensive service call to clean the machine. Laser-compatible glossy papers are engineered to withstand fuser temperatures and produce clean output. The color quality for photographic images is noticeably lower than inkjet results, but laser-glossy works well for text-heavy marketing documents with photo accents where speed and volume matter more than photo realism.
Final Thoughts
Mastering how to print on glossy paper comes down to three things working together: the right paper type, the correct media setting in your printer driver, and careful handling once the print exits the tray. Start by changing your media type setting to "Glossy Photo Paper" today — that single adjustment fixes the majority of dull, grainy results most people blame on their printer. Pick up a pack of your printer brand's own glossy paper, run a test print, and save your optimal settings as a named preset so every future job starts from a proven baseline. Once you've dialed it in, the quality difference over plain paper is immediately obvious and genuinely satisfying.


About Chris & Marry
Chris and Mary are a couple with a shared background in graphic design and print production who have spent years working with printers across creative and professional contexts — from art printing and photo output to label production and professional document work. Their combined experience evaluating printer performance, color accuracy, and paper handling across inkjet and laser platforms gives them a practical, hands-on perspective on what makes a printer worth buying. At ShopChrisAndMary, they cover printer reviews, buying guides, and recommendations for artists, photographers, and professional users.
Time to get FREE Gifts. Or latest Free printers here.
Disable Ad block to reveal all the info. Once done, hit a button below