Ever pulled a favorite shirt out of the closet only to find the screen print cracking, peeling, or just plain embarrassing? The answer is yes — you can absolutely remove screen printing from clothes at home, and this guide shows you exactly how to do it without wrecking the fabric. From fast solvent fixes to heat gun techniques, you'll find the right method for your ink type, your fabric, and your patience level. If you've worked with iron-on transfer paper before, you'll recognize some of the same bonding principles at work here.
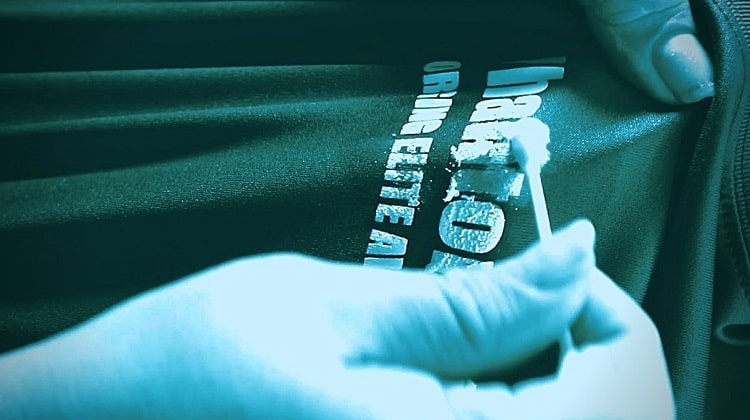
Screen printing uses plastisol or water-based inks that are heat-cured into the fabric during manufacturing. That bond is designed to survive hundreds of wash cycles — which is exactly why it takes more than a damp cloth to undo. You need the right chemical action, the right heat, or a combination of both. Pick the wrong approach and you'll end up with a bleached patch, stiff residue, or a hole where the print used to be.
Before you grab the nearest solvent, spend two minutes identifying your fabric type and whether the ink is plastisol or water-based. That one step separates a clean, successful result from a permanently damaged garment. For anyone exploring broader art and craft printing techniques, understanding how inks bond to surfaces is foundational — and it applies whether you're working with fabric, paper, or specialty media.
Contents
- The Fastest Methods That Actually Work
- How to Remove Screen Printing from Clothes: Step by Step
- Pro Techniques for Stubborn Prints
- Screen Printing Myths You Should Stop Believing
- What Works on Different Fabric Types
- When Removal Goes Wrong (and How to Fix It)
- Keeping Your Clothes Print-Free for Good
- Frequently Asked Questions
The Fastest Methods That Actually Work
When you need results today, three methods consistently outperform everything else. Each targets a specific ink type, so knowing which one to reach for saves time and protects your garment from unnecessary damage.
- Nail polish remover (acetone): Works well on plastisol inks on 100% cotton. Apply with a cotton ball, let it sit 30 seconds, then gently scrape with a credit card edge. Rinse immediately with cold water.
- Rubbing alcohol (90%+ isopropyl): Gentler than acetone and effective on water-based inks. Saturate the print, wait 60 seconds, then rub with a microfiber cloth using small circular motions. Safe for most fabric types.
- Commercial plastisol ink remover: Products like Speedball Screen Printing Ink Remover are formulated specifically for this job. Best for thick, heavily cured prints. Follow the product instructions exactly — these are more concentrated than household solvents.
For any solvent-based approach, follow this sequence every time:
- Test on a hidden seam or hem interior before touching the print.
- Work in a well-ventilated area — solvent fumes build up quickly indoors.
- Place a folded cloth inside the garment to prevent bleed-through to the back panel.
- Apply the solvent, wait the recommended time, then scrape or rub gently.
- Rinse the treated area with cold water immediately after.
- Machine wash the entire garment as soon as you've finished treating it.
Never mix solvents. Combining acetone and bleach, for example, produces toxic chlorine gas. Use one product per session, rinse fully, and let the garment dry before trying a different method.
How to Remove Screen Printing from Clothes: Step by Step
The right method depends on your tools, your fabric, and the stubbornness of the print. Here are three proven approaches broken down into clear, repeatable steps.
Solvent-Based Removal
This is the most accessible method for home use. It works best on cotton garments carrying plastisol or water-based inks.
- Lay the garment flat on a hard surface. Slide a protective cloth inside to catch any bleed-through.
- Dampen a cotton ball or cloth pad with acetone or rubbing alcohol — don't soak it.
- Press the dampened pad firmly onto the print and hold for 30–60 seconds without rubbing.
- Use a dull plastic scraper or the edge of a credit card to lift loosened ink flakes.
- Repeat the soak-and-scrape cycle until the print lifts away.
- Rinse with cold water, then run the garment through a normal wash cycle.
Expect multiple rounds on thick prints. Patience produces better results than pressure — aggressive scrubbing tears fibers before it removes ink. This approach mirrors the logic professionals use when they remove printer ink from paper: targeted chemical action, then mechanical lift, then rinse.
Heat Gun Method
Heat softens the plasticizers in plastisol ink, making the layer peel instead of scrape. This method works best on thick, rubbery prints — the kind that feel clearly raised above the fabric surface.
- Set your heat gun to a medium setting (around 250–300°F / 121–149°C).
- Hold the gun 2–3 inches from the print and move it in slow, steady circles.
- After 20–30 seconds, the print surface will turn slightly tacky or begin to bubble at the edges.
- Press a strip of masking tape firmly onto the softened print, then pull back sharply at a 45-degree angle.
- Repeat the heat-then-lift cycle, working across the print in sections.
- Follow up with a solvent treatment on any residue that remains.
Do not overheat synthetic fabrics. Polyester melts at significantly lower temperatures than cotton. Check your garment's care label before using this method — if it says anything about low-heat care, switch to a solvent approach instead.
Spot Bleaching (White Fabrics Only)
Spot bleaching is a last-resort option reserved strictly for white or off-white cotton garments. It works by oxidizing ink pigments rather than physically lifting them — which means it can't be undone if it goes wrong.
- Mix one part household bleach with four parts water in a small bowl.
- Apply with a cotton swab directly to the printed area only — precise application matters.
- Wait no more than 5 minutes, then rinse immediately and thoroughly with cold water.
- Neutralize with a diluted white vinegar solution before the final wash to halt the oxidation reaction.
Bleach weakens cotton fibers with repeated application. Use this once, on a garment where the print problem is worse than a slightly weakened fabric would be.
Pro Techniques for Stubborn Prints
Some prints resist every standard approach. That's usually down to the ink type, the original curing temperature, or a layered application with multiple colors or finishes. Here's how to handle both scenarios.
Plastisol vs. Water-Based Inks
Your choice of solvent should match the ink family. According to screen printing industry standards, the two dominant ink types behave very differently under chemical treatment:
- Plastisol inks are PVC-based and sit on top of fabric fibers. They respond well to acetone, commercial plastisol removers, and heat. You can identify them by feel — they're rubbery, thick, and slightly raised when pressed.
- Water-based inks penetrate deeper into the fabric weave. Isopropyl alcohol, rubbing alcohol, and warm soapy water work better here. These prints feel soft and flat — almost like dyed fabric rather than a coating.
If you genuinely can't tell which type you're dealing with, start with 90%+ isopropyl alcohol. It's effective across both ink families at lower risk to the fabric than acetone.
Layered or Thick Prints
Multi-color designs, puff prints, and glitter finishes have multiple stacked layers. You can't remove them all in one pass — each layer needs its own treatment cycle.
- Start with the heat gun to soften and lift the top layer without disturbing what's beneath.
- Apply solvent to the next exposed layer and let it penetrate fully before scraping.
- For glitter or metallic inks, use a soft-bristle toothbrush after the solvent soak to dislodge loose particles before scraping.
- Work from the edges of the print toward the center — the perimeter loosens fastest, and reducing it first makes the dense core easier to address.
Pro tip: On layered prints, always loosen the perimeter first. The center is the most cured area — working inward from loosened edges means you're never fighting the full bond resistance all at once.
If you plan to replace the removed print with a fresh transfer, check out our guide on printing white text on transfer paper — it covers high-contrast transfer setups that read cleanly against any fabric color, including reclaimed garments with subtle ghost images.
Screen Printing Myths You Should Stop Believing
Misinformation spreads fast in DIY communities. These are the most common myths about how to remove screen printing from clothes — and the reality behind each one.
| Myth | Reality | What to Do Instead |
|---|---|---|
| Washing in hot water removes screen prints | Hot water can cause slight fading over time but won't remove cured plastisol or water-based ink | Use a targeted solvent applied directly to the print |
| Bleach works on any fabric color | Bleach strips fabric dye along with the ink, leaving a permanent light spot on colored garments | Reserve bleach for white cotton garments only |
| Freezing the garment makes the print crack off cleanly | Freezing makes plastisol brittle but doesn't separate it from fibers — it just splinters into smaller embedded pieces | Use heat to soften and lift instead |
| Any adhesive remover gets the job done | Many adhesive removers leave oily residue that permanently stains fabric fibers | Use purpose-made plastisol removers or tested solvents only |
| One treatment pass is enough | Most screen prints require 3–6 cycles for complete removal — fewer passes just spreads residue | Plan for multiple applications and work methodically |
| Scrubbing harder speeds up removal | Aggressive mechanical scrubbing damages fabric fibers before it removes ink | Let the chemical do the work — apply solvent, wait, then lift |
There are no chemical shortcuts that skip the bond-breaking chemistry. The methods that work all rely on either dissolving the ink's plasticizers, oxidizing the pigments, or softening the layer with heat. Any approach that skips one of those mechanisms is guesswork.
What Works on Different Fabric Types
The garment's fiber content matters as much as the ink type. A method that safely cleans a cotton tee can permanently warp or stain a polyester athletic jersey.
Cotton and Cotton Blends
Cotton is the most forgiving fabric for removal work. It tolerates acetone, rubbing alcohol, heat gun application, and brief contact with diluted bleach (on white garments only).
- Start with 90%+ isopropyl alcohol for most cotton garments — it's effective and low-risk.
- Escalate to acetone if plastisol ink refuses to budge after two to three alcohol cycles.
- Heat gun use is safe on cotton — keep the gun moving to prevent scorching and never hold it in one spot.
Cotton blends (60/40 or 50/50 cotton-polyester) tolerate alcohol-based solvents well but need lower heat gun temperatures than pure cotton. Treat them like polyester when it comes to heat, and like cotton when it comes to solvents.
Polyester and Synthetic Blends
Polyester is significantly more sensitive to both chemical and thermal stress. Certain solvents dissolve synthetic fibers outright, and temperatures that are safe for cotton will melt polyester.
- Avoid acetone entirely on polyester — it dissolves or permanently distorts synthetic fibers.
- Use rubbing alcohol or a commercial non-acetone ink remover labeled safe for synthetics.
- Keep heat gun temperatures below 200°F (93°C) — even brief overheating at higher settings risks warping the fabric structure.
- Test every method on a hidden seam before applying anything to the print area.
For polyester performance wear or stretch fabrics, a commercial plastisol remover certified safe for synthetics is your best and safest option. Don't improvise with household chemicals on these fabrics.
Dark vs. Light Fabrics
The fabric's color narrows your options and affects how visible any residue will be after treatment.
- Light fabrics: More methods are available. Diluted bleach is viable on white cotton. Solvents rarely leave lasting marks on pale colors when rinsed promptly.
- Dark fabrics: Bleach is completely off the table. Some solvents can lighten the surrounding fabric if they spread beyond the print boundary. Stick to isopropyl alcohol or dedicated ink removers, use a cotton swab for precision at the print edges, and test first.
Ghost images — faint outlines of the original print — show up more clearly on dark fabrics. How to handle those is covered in the next section.
When Removal Goes Wrong (and How to Fix It)
Even with the right technique, things occasionally go sideways. Here's how to diagnose the most common problems and recover without making them worse.
Ink Residue and Ghost Images
A ghost image is the faint outline left after the main ink layer is removed. It happens when pigment particles have penetrated into the fabric fibers rather than sitting on the surface.
- Apply a second round of isopropyl alcohol directly to the ghost area using a cotton ball.
- Work the solvent in with a soft-bristle toothbrush using gentle circular motions — don't press hard.
- For stubborn ghosts on white cotton, a diluted OxiClean soak can oxidize residual pigment without damaging the fabric. Follow the package instructions for fabric soaking.
- Accept that some water-based ink ghosts are permanent. Once pigment bonds at a molecular level to individual fibers, no household treatment will fully remove it.
If the ghost image bothers you on a garment you want to repurpose, consider printing a new design over it rather than continuing to treat it. Our guide on printing digital scrapbook paper has useful insights on layering designs over imperfect or textured backgrounds — the same principles apply to fabric.
Fabric Damage
Removal-related fabric damage falls into three categories, each with a specific cause:
- Thinning or pilling: Caused by too much mechanical scrubbing. Switch to a purely chemical approach and let the solvent do the work.
- Color fading or light patches: Solvent spreading beyond the print boundary. From now on, use a cotton swab for precision at the print edges to keep the chemical contained.
- Holes or tears: Heat gun held too close or too long, or over-saturation with acetone on thin fabric. Keep the heat gun in constant motion and use solvents sparingly in thin, controlled applications.
If fabric damage has already occurred, repair options are limited. A small hole can be patched with an iron-on fabric repair patch — which also gives you a clean, fresh surface for a new custom design. For guidance on what transfer media and printers work best for patches, labels, and custom fabric work, browse our full art and craft printer resource library.
Keeping Your Clothes Print-Free for Good
Once you've successfully removed a screen print, a few straightforward habits protect your work and extend the life of the garment.
- Wash inside-out on cold. Hot water can push any remaining ink residue deeper into fibers, making future removal harder. Cold water keeps residue loose.
- Air dry when possible. Dryer heat can rebond loosened residue back into the fabric. Air drying keeps any remaining traces at the surface where they're manageable.
- Inspect after the first post-removal wash. If residue resurfaces after washing, treat it immediately while it's freshly loosened rather than waiting for it to re-cure.
- Store treated garments away from direct heat. Windowsills, radiators, and hot cars create the same conditions as the original curing process — prolonged heat exposure can rebond loose particles over time.
If you plan to apply a new print to the reclaimed garment, let it sit for a full 24 hours after the final wash before using any transfer method. This ensures all solvent residue has fully evaporated — residual acetone or alcohol actively interferes with adhesion and can cause new transfers to peel prematurely. Our guide on printing on clear sticker paper covers adhesion principles in detail; the same surface preparation logic translates directly to fabric transfer work.
Good technique from the start also reduces how often you need to remove prints at all. If you're creating your own custom garments, testing your print setup on scrap fabric before committing to a final shirt saves time, money, and the headache of doing this whole process over again.
Frequently Asked Questions
Can you remove screen printing from any type of fabric?
Most screen prints can be removed from cotton and cotton blends using solvents or controlled heat. Polyester and synthetic blends require gentler, non-acetone methods and low heat. Delicate fabrics like silk, wool, or rayon are high-risk — test on a hidden seam first, and for valuable pieces, consult a professional dry cleaner rather than attempting home removal.
Does nail polish remover damage clothing?
Acetone-based nail polish remover can damage synthetic fabrics, elastic fibers, and some dyed cotton if left on too long or spread too broadly. On 100% cotton garments, it's generally safe when used with short contact time, immediate rinsing, and precise application. Always test on a hidden seam before applying it to the visible print area.
How many treatment cycles does it take to fully remove a screen print?
Most screen prints require between 3 and 6 treatment cycles for complete removal. Thick plastisol prints or garments with heavily cured inks may need more. Work in sessions and let the garment dry between rounds rather than trying to remove everything in a single aggressive pass — overworking the fabric causes more lasting damage than taking extra time.
Will the removal process leave a ghost image?
Ghost images are common, especially with water-based inks that penetrate deeply into fabric fibers. You can reduce them with follow-up solvent treatment and a soft brush, but some residue may be permanent — particularly on dark fabrics where the contrast between pigment and background is highest. An OxiClean soak helps on white cotton; on colored or dark fabrics, options are more limited.
Can I use a hair dryer instead of a heat gun?
No — a standard hair dryer doesn't generate the temperatures needed to soften cured plastisol ink. Heat guns operate at 250–400°F (121–204°C), while most hair dryers cap out around 140°F (60°C). The heat method only works when the ink's plasticizers actually soften, which requires a true heat gun. A hair dryer will warm the surface without meaningfully loosening the ink bond.
Is it safe to try removing a print from a vintage or valuable garment?
Proceed with extreme caution on vintage or collector pieces. Any chemical or heat treatment carries a real risk of irreversible damage — color change, fiber weakening, or permanent distortion. If the garment has significant monetary or sentimental value, consult a professional textile conservator before attempting anything at home. A professional consultation costs far less than replacing a ruined piece.
Can I apply a new print to the garment after removing the old one?
Yes, and it's one of the most popular reasons to go through the removal process. After full removal, wash and dry the garment completely, then wait 24 hours before applying a new transfer. The fabric must be entirely solvent-free and dry for a new print to bond correctly. For high-contrast transfer setups that perform well on reclaimed garments, our guide on printing white text on transfer paper covers everything you need to know about getting clean results the first time.
Final Thoughts
Removing screen printing from clothes is a skill that pays off every time you rescue a garment others would throw away — and now you have every method, every precaution, and every troubleshooting fix you need to do it right. Pick up the right solvent or heat tool for your fabric type, test on a hidden seam, and work in patient cycles rather than rushing the process. When you're ready to put a fresh design on your reclaimed garment, explore our full range of art and craft printer guides for everything from heat transfer setups to professional label and custom print solutions.



About Chris & Marry
Chris and Mary are a couple with a shared background in graphic design and print production who have spent years working with printers across creative and professional contexts — from art printing and photo output to label production and professional document work. Their combined experience evaluating printer performance, color accuracy, and paper handling across inkjet and laser platforms gives them a practical, hands-on perspective on what makes a printer worth buying. At ShopChrisAndMary, they cover printer reviews, buying guides, and recommendations for artists, photographers, and professional users.
Time to get FREE Gifts. Or latest Free printers here.
Disable Ad block to reveal all the info. Once done, hit a button below