If you want to know how to measure paper thickness, here's the direct answer: use a digital caliper, place a sheet between the jaws, close them gently, and read the display in millimeters or thousandths of an inch. That's really all there is to the mechanical part. Where it gets interesting is understanding what those numbers mean for your printing projects and why getting them right matters. From photo printing to label sheets and craft card stock, paper thickness affects feed reliability, print quality, and the finished feel of your work. Browse our printing tips section for more practical guides like this one.
Paper thickness is described in several units depending on who's talking. In the United States, commercial printers often use points (one point equals 0.001 inch) or mils. Most of the world defaults to millimeters. You'll also see paper described by its GSM (grams per square meter) weight, which is related to thickness but not identical to it. Two sheets with the same GSM rating can measure differently with a caliper because manufacturing processes, coatings, and fiber density all influence how much physical space a sheet occupies.
For anyone who prints regularly, understanding thickness is genuinely practical knowledge. Paper that's too thick for your printer's feed path causes jams, strains rollers, and can leave marks on internal components. Paper that's too thin may wrinkle or bleed through. Knowing what you're working with before you load the tray saves time, paper, and wear on your machine.
Contents
- Understanding Paper Thickness: The Basics
- The Right Tools to Measure Paper Thickness
- How to Measure Paper Thickness Step by Step
- Paper Thickness in Real Printing Scenarios
- Tips for Getting Consistent, Accurate Readings
- What Measuring Tools Actually Cost
- Best Practices for Matching Paper to Your Printer
- Frequently Asked Questions
Understanding Paper Thickness: The Basics
What the Numbers Actually Mean
When someone describes paper as "10 point," "0.25mm," or "100 GSM," they're all describing valid properties of the same sheet — but measuring different things. Points and mils are the dominant units in U.S. commercial printing. Millimeters appear on packaging from European and Asian manufacturers. GSM tells you how heavy the paper is per square meter, which loosely signals thickness — higher GSM tends to mean a thicker sheet, but not always.
Standard copy paper runs about 0.05mm to 0.10mm thick, roughly equivalent to 20lb (75 GSM) to 24lb (90 GSM). Photo paper typically falls between 0.18mm for lightweight glossy and 0.30mm or more for premium luster and matte finishes. Card stock starts around 0.20mm and can exceed 0.45mm for heavy varieties. If you work on crafting projects alongside printing, the guide to scrapbook paper types, sizes, and weights is worth reading — it covers how thickness plays into paper selection for hands-on projects.
The Difference Between Weight and Thickness
Paper weight and paper thickness are genuinely different measurements. Weight describes how much the paper is — the mass of a given quantity of sheets cut to a standard size. Thickness is a physical dimension: how much space the sheet occupies between two parallel surfaces. A heavy coated glossy sheet can weigh more than uncoated bond paper of identical thickness because the coating adds dense mass without much bulk. That's why relying on GSM alone to predict printer compatibility can mislead you — a sheet that feels substantial may still be physically thin enough to slip through without issue, and vice versa.
Pro tip: Always check the thickness specification in millimeters alongside the GSM rating when selecting specialty paper — they tell you different things, and both affect how your printer handles the sheet.
The Right Tools to Measure Paper Thickness
Digital Calipers
A digital caliper is the most practical tool for measuring paper thickness at home or in a small print studio. Open the jaws, slip a sheet between them, close gently until contact is made, and read the display. Most digital calipers resolve to 0.01mm, which is more than adequate for paper work. They also switch between millimeters and inches with a button press — useful when you're cross-referencing specs from different sources. A reliable caliper costs $10 to $25 and will handle this task for years.
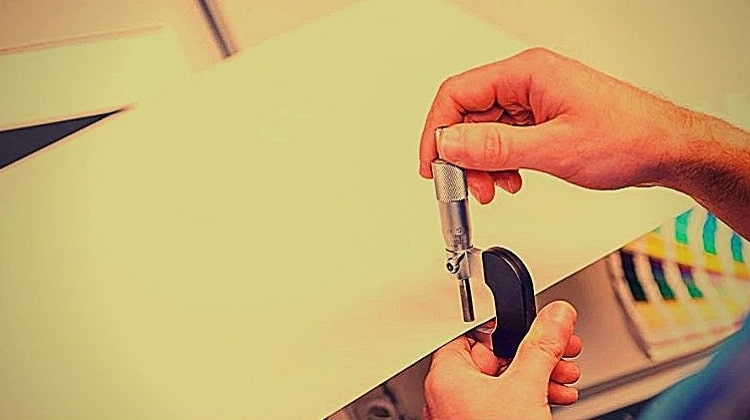
Micrometers
A micrometer (sometimes called a screw gauge) reads to 0.001mm — ten times more precise than a typical caliper. That level of resolution matters in professional printing environments where tolerances across large batches need to be extremely consistent. For home users or small studios, a micrometer is usually more precision than you need. They cost more, require a bit more technique to use correctly, and the extra decimal point rarely changes a practical decision about whether to load a paper type.
Dedicated Thickness Gauges
Dedicated paper thickness gauges use a spring-loaded mechanism that applies consistent clamping pressure every time you take a reading. That consistency eliminates one variable — operator squeeze pressure — that can introduce error when using a caliper. These instruments are common in quality-control settings and paper manufacturing. For most home or small-office use, a good digital caliper covers the same need at a fraction of the cost.
How to Measure Paper Thickness Step by Step
Setting Up Your Caliper
Start with a properly zeroed tool. Close the jaws completely and press the zero button on a digital caliper. If the display reads anything other than 0.00, calibrate according to the manual before continuing. Wipe both jaw faces with a clean, dry cloth — even a thin film of dust or oil can add a few hundredths of a millimeter to your reading. This sounds fussy, but it takes ten seconds and makes your results trustworthy.
Taking the Measurement
Open the jaws slightly wider than the paper's expected thickness. Lay one sheet flat between the jaws — not folded, not angled. Slowly close the jaws until they just make contact with both surfaces. Use light pressure only. Squeezing too hard compresses the paper fibers and gives you a reading thinner than the sheet's actual resting thickness. Note the reading, then repeat two or three times at different spots across the sheet and average the results. Slight variation across a sheet is completely normal.
Measuring a Stack for Greater Accuracy
Very thin papers — anything under 0.10mm — are tricky to measure individually because a tiny error represents a significant percentage of the true value. A better approach is to measure a neat stack of 10 sheets and divide the result by 10. This averages out small inconsistencies and gives you a more reliable per-sheet figure. It's also a useful technique when you want to predict how a full tray load will behave, since knowing the compressed thickness of a 50-sheet stack helps you gauge whether your printer's feed mechanism will handle it smoothly.
Paper Thickness in Real Printing Scenarios
Photo and Fine Art Printing
Photo printers are particularly sensitive to thickness variation. Premium inkjet photo papers typically run 0.20mm to 0.30mm. Some fine art papers — textured watercolor sheets and cotton rag media — push 0.40mm or more and require a straight rear-feed path to pass through without bending. Loading a sheet that exceeds your printer's maximum media thickness can cause feed refusals, mid-print jams, or output banding. If you notice that prints look faded or uneven alongside feed issues, it's also worth checking whether your printer is printing too light — sometimes media mismatches and driver settings compound each other.
Label and Sticker Media
Label stock varies more in thickness than almost any other media category. A thin matte label sheet on a light liner might measure 0.10mm total, while a premium glossy sticker sheet with a thick backing liner can easily hit 0.25mm or more. Feeding media that exceeds your printer's threshold puts real stress on the feed rollers and internal guides. Keeping those components in good condition matters too — the guide on how to clean printer rollers explains how debris and buildup contribute to feed problems, especially with thicker specialty sheets.
Warning: Never force thick cardstock or sticker sheets through a printer rated for thinner media — it can permanently damage the feed rollers or warp the internal paper path guides.
Tips for Getting Consistent, Accurate Readings
Avoiding Common Measurement Mistakes
A few consistent habits will sharpen your results immediately. Always measure at room temperature — paper expands in warmth and contracts in cold, so measurements taken right after pulling a ream from a cold car trunk won't reflect normal operating thickness. Measure at least one inch from any cut edge, since guillotine cutting can slightly compress or fray edge fibers and produce artificially low readings. If the paper has a delicate coating — glossy, luster, or textured art finishes — be gentle when closing the caliper jaws to avoid scratching the surface.
Humidity is another factor worth knowing about. Paper absorbs moisture from the air and thickens slightly in humid conditions. If you're printing in a climate with high humidity and you need precision, store your paper sealed until you're ready to use it. For everyday printing decisions, the difference is rarely significant — but in commercial or fine art contexts where consistency across batches matters, it's worth keeping in mind.
What Measuring Tools Actually Cost
Entry-Level Options
You genuinely don't need to spend much to get accurate paper thickness readings. Entry-level digital calipers from widely available brands deliver 0.01mm resolution for $10 to $25 — that's sufficient precision for any paper measuring task you're likely to encounter at home or in a small studio. Most come with a battery and a protective case. If you only need to measure paper occasionally and aren't running a professional operation, this price range covers everything.
| Tool Type | Typical Price Range | Resolution | Best For |
|---|---|---|---|
| Entry-level digital caliper | $10–$25 | 0.01mm | Home use, hobby printing, general media |
| Mid-range digital caliper | $30–$60 | 0.01mm | Small studios, frequent use |
| Digital micrometer | $40–$120 | 0.001mm | Professional print shops, batch QC |
| Dedicated paper thickness gauge | $80–$300+ | 0.001mm | Industrial use, quality control labs |
Professional-Grade Equipment
If you're sourcing paper in bulk, running a commercial print operation, or doing fine art reproduction where consistency across large runs matters, stepping up to a mid-range micrometer or a dedicated gauge is worth it. Instruments from established measurement brands in the $80 to $150 range will last decades with proper care. At the professional level, the main advantage isn't just precision — it's repeatability. A spring-loaded gauge applies the same clamping force every time, which means different team members get consistent readings without needing to calibrate their grip pressure.
Best Practices for Matching Paper to Your Printer
Checking Manufacturer Specs
Every printer has a maximum media thickness listed in its technical specifications — usually expressed in millimeters or points. You'll find it in the user manual, on the manufacturer's support page, or sometimes printed directly on the paper tray. Before buying a specialty paper in bulk, compare its measured thickness against your printer's stated maximum. Most standard inkjet printers top out around 0.30mm to 0.35mm through the main tray. Many photo and art printers offer a rear straight-path slot that handles thicker media — sometimes up to 0.50mm or more — because the sheet doesn't need to bend around a curved feed path.
Testing Before Committing to a Full Run
Even when the numbers check out, always run a single test print before feeding a full stack. Measure the paper, confirm it's within spec, load two or three sheets, and print one page. Check that the feed was smooth, that the paper exited cleanly, and that the print quality looks right. Batch-to-batch variation is real — paper from the same brand and the same product line can vary slightly between production runs. A quick test print on a few sheets is far less painful than clearing a jam or reprinting a full batch.
Frequently Asked Questions
What unit is paper thickness measured in?
Paper thickness is most commonly measured in millimeters (mm) or in points (where 1 point equals 0.001 inch). Some U.S. printing contexts also use mils, which is the same as thousandths of an inch. Millimeters are the international standard and the most widely used unit for comparing paper across different brands and regions.
Can I measure paper thickness without a caliper?
A standard ruler won't give you an accurate reading for a single sheet because paper is far thinner than the smallest ruler increment. A practical workaround is to stack 10 sheets neatly, measure the stack with a ruler, and divide by 10. It's less precise than a caliper but gives you a usable estimate when you don't have measuring tools on hand.
How thick is standard copy paper?
Standard 20lb (75 GSM) copy paper measures approximately 0.05mm to 0.10mm thick. The exact figure varies slightly by brand and manufacturing batch. Most common office paper falls in the 0.08mm to 0.10mm range when measured with a digital caliper under light pressure.
How thick is cardstock?
Cardstock thickness varies widely by weight. Light cardstock (65lb cover / 176 GSM) typically measures around 0.20mm to 0.23mm. Heavy cardstock (110lb cover / 300 GSM) can reach 0.40mm or more. When in doubt, measure the specific product you're using rather than relying on weight ratings alone.
Does paper thickness affect print quality?
Yes, it can. Paper that's too thick for your printer's feed path may cause jams, banding, or uneven ink application. Paper that's too thin may wrinkle or allow ink to bleed through to the other side. Using paper within your printer's specified thickness range helps ensure consistent, clean output every time.
What is the maximum paper thickness for most inkjet printers?
Most standard consumer inkjet printers handle paper up to about 0.30mm to 0.35mm through the main tray. Many photo and art inkjet printers include a rear straight-feed slot that accommodates thicker media — sometimes up to 0.50mm or more. Always check your specific printer's manual for the exact limit before loading specialty media.
Is GSM the same as paper thickness?
No. GSM (grams per square meter) measures paper weight, not physical thickness. Heavier GSM paper is generally thicker, but not always — coated papers can be dense and heavy while remaining relatively thin. For printer compatibility, always measure actual thickness in millimeters rather than relying solely on GSM as a proxy.
Final Thoughts
Knowing how to measure paper thickness is one of those small skills that quietly improves everything you do at the printer — fewer jams, better media selection, more consistent results. Pick up a basic digital caliper if you don't already have one, take a few measurements on the papers you use most, and compare them against your printer's specs. That one small habit will save you more frustration than almost any other printing tip you'll come across.


About Chris & Marry
Chris and Mary are a couple with a shared background in graphic design and print production who have spent years working with printers across creative and professional contexts — from art printing and photo output to label production and professional document work. Their combined experience evaluating printer performance, color accuracy, and paper handling across inkjet and laser platforms gives them a practical, hands-on perspective on what makes a printer worth buying. At ShopChrisAndMary, they cover printer reviews, buying guides, and recommendations for artists, photographers, and professional users.
Time to get FREE Gifts. Or latest Free printers here.
Disable Ad block to reveal all the info. Once done, hit a button below