The answer to how to print CD case covers is simpler than most people expect — set the document size to 4.724 × 4.724 inches, use the right paper, and print at the highest quality the printer allows. Our team at ShopChrisAndMary has walked through this process dozens of times, and a well-printed CD case insert rivals anything bought in a store. For anyone who enjoys specialty printing projects, our guide on how to print on glossy paper covers the paper type that delivers the sharpest results for inserts like these.
CD cases have fixed, specific dimensions. The standard jewel case front panel measures 4.724 × 4.724 inches (120 × 120 mm), and the tray card — the strip visible through the back panel — runs roughly 5.906 × 4.625 inches. Getting those numbers right is the whole trick. Most of the confusion our team encounters comes from printing on standard letter paper without adjusting a single setting, then wondering why the cover doesn't slide in cleanly.
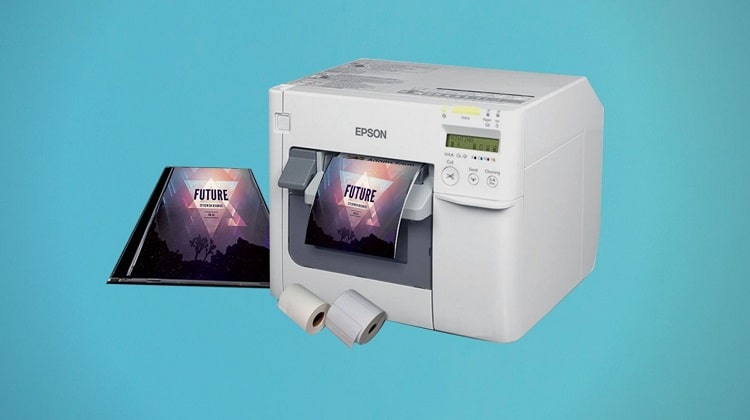
The good news is that almost any printer capable of handling photo paper can produce sharp, colorful inserts. Our team has tested inkjet, laser, and dedicated photo printers for this task, and each has real strengths. What matters more than the printer brand is the setup process — and that's exactly what this guide covers from start to finish.
Contents
- How to Print CD Case Covers: A Step-by-Step Walkthrough
- When Printing CD Cases at Home Is Worth It (and When It Isn't)
- Printing Mistakes That Ruin CD Case Inserts
- What It Really Costs to Print CD Case Covers at Home
- Real Projects That Use Printed CD Case Covers
- CD Cover Printing Myths Worth Clearing Up
- Frequently Asked Questions
How to Print CD Case Covers: A Step-by-Step Walkthrough
Learning how to print CD case inserts correctly comes down to three things: accurate dimensions, proper document setup, and the right print settings. Our team has found that most failed attempts trace back to skipping one of these steps.
Getting the Dimensions Right
The standard CD jewel case uses two distinct insert sizes. The front cover is a perfect square at 4.724 × 4.724 inches (120 × 120 mm). The back tray card — the piece visible through the plastic shell on the reverse — measures approximately 5.906 × 4.625 inches (150 × 117.5 mm). Our team recommends creating separate documents for the front and back rather than trying to fit both onto a single sheet, which reduces trimming errors significantly. For a full wraparound booklet that folds inside the front cover, the width roughly doubles to 9.449 inches while the height stays the same.
Setting Up the Document in Software
Any design software with custom page sizes works well here. Adobe Photoshop, Canva, Microsoft Word, and free tools like GIMP all handle custom dimensions without trouble. Our team's preferred approach is to create a new document at exactly the target dimensions — no scaling afterward. Set the resolution to at least 300 DPI (dots per inch — a measure of print sharpness) before placing any artwork. Starting at 300 DPI and printing at 100% scale is the most reliable path to clean results every time.
For trimming guides, adding a 0.125-inch bleed (extra image area beyond the trim line) on all sides prevents white edges if the cut lands slightly off. Most design apps label this option simply as "bleed" inside their document setup dialog.
Print Settings That Make a Difference
Once the document is ready, the printer driver settings do the heavy lifting. Our team consistently gets the best results by selecting the correct paper type — photo paper or glossy paper rather than "plain paper." This changes how much ink the printer deposits and how it dries. Setting print quality to "Best" or "High Quality" is equally important. Our team also recommends running a test page on plain copy paper first, holding it up to the case to check alignment and sizing, then running the final version on quality photo paper.
Pro tip from our team: Always run a test print on plain copy paper before loading expensive glossy stock — it costs almost nothing and catches sizing or alignment problems before they waste a good sheet.
When Printing CD Cases at Home Is Worth It (and When It Isn't)
Printing CD case covers at home makes clear sense for some projects and less sense for others. Our team has seen both ends of the spectrum, and thinking through the trade-offs upfront saves time and money.
Good Reasons to Print at Home
For small runs — a handful of discs for personal use, handmade gifts, or local distribution — home printing is almost always the practical choice. Turnaround is immediate, the cost per sheet stays low, and full creative control stays with the person making it. Home users who already own a good inkjet or photo printer can produce inserts that look genuinely professional when using high-quality glossy paper. Our team also finds that home printing works especially well for prototyping — testing a design before committing to a larger run elsewhere.
Anyone working on projects that blend physical and digital media will find that printing album covers and disc inserts at home fits naturally into a broader handmade workflow. The setup process translates directly from one project to the next.
When a Print Shop Makes More Sense
For quantities above 20 or 30 copies, a local or online print shop typically delivers better cost efficiency and consistency. Professional print services also offer finishes — matte laminate, spot UV coating, calibrated color management — that home printers simply cannot match. Our team recommends getting an outside quote whenever an order runs into double digits. The per-unit cost at a print shop often drops sharply at volume, and the consistency across every sheet is genuinely hard to replicate with home equipment.
Worth knowing: Print shops work in CMYK color, so designs created in RGB on screen may shift slightly in the final print — converting files to CMYK before submitting prevents most color surprises.
Printing Mistakes That Ruin CD Case Inserts
Our team has seen the same errors come up repeatedly. Most are easy to avoid once the patterns are clear.
Wrong Paper and Wrong Size
The most common problem is printing at letter size (8.5 × 11 inches) and assuming the result can be trimmed down to fit. While trimming is sometimes workable, it introduces misalignment risk and wastes material. The cleaner method is always to set exact document dimensions upfront and print at 100% scale — no scaling, no "fit to page" checkbox. On the paper side, using standard copy paper for what should be a photo-quality insert produces dull, flat colors and a flimsy feel that simply doesn't suit a jewel case.
Ignoring Image Resolution
Low-resolution images are the other main culprit. Artwork that looks sharp on screen at 72 DPI prints blurry and pixelated at actual size. Our team always verifies that every image in the design is at least 300 DPI at the final print dimensions before sending anything to the printer. Pulling a small image from a website and stretching it to fill a 4.724-inch square is a reliable way to end up with a blurry mess. Starting with high-resolution source files — or creating original artwork at 300 DPI from scratch — removes this issue entirely.
What It Really Costs to Print CD Case Covers at Home
Breaking down the actual numbers helps most home users decide whether printing at home makes financial sense for a given project. The math is straightforward.
Home Printing Costs
Ink and paper are the two main variables. Glossy photo paper suitable for CD inserts typically runs between $0.15 and $0.50 per sheet depending on brand and finish. Ink cost varies by printer model — color inkjet printers average roughly $0.05 to $0.20 per page for a heavily saturated print. Adding those together, most home setups spend between $0.20 and $0.70 per insert. That's a reasonable cost for small runs, and the convenience of printing immediately rather than waiting for an order is real.
Comparing to Online Print Services
Online print services typically start around $0.80–$1.50 per unit for small quantities but drop sharply for larger orders. The table below gives a rough comparison our team put together based on commonly available rates.
| Print Method | Estimated Cost Per Insert | Best Quantity Range | Quality Ceiling |
|---|---|---|---|
| Home inkjet (plain paper) | $0.10–$0.30 | 1–5 copies | Acceptable |
| Home inkjet (glossy photo paper) | $0.20–$0.70 | 1–20 copies | Very Good |
| Home laser printer | $0.15–$0.40 | 5–30 copies | Good (less color depth) |
| Online print service (small run) | $0.80–$1.50 | 10–50 copies | Excellent |
| Online print service (bulk) | $0.20–$0.50 | 50+ copies | Excellent + consistent |
Real Projects That Use Printed CD Case Covers
Seeing where other people apply this technique helps put the whole process in context. Our team has come across a wider range of uses than most people might expect.
Musicians and Independent Bands
Independent musicians still use physical CDs for merch tables, local venue sales, and press kits sent to promoters or radio stations. A sharp, custom-printed insert makes a real difference in how a release is perceived by whoever opens the case. Our team has seen small bands produce genuinely impressive jewel case packaging using nothing more than a consumer inkjet and a pack of glossy photo paper. The key is treating the insert design with the same care as the music — high-resolution artwork, tight margins, and a test print before the full run. A well-made physical release stands out in an era when most music arrives as a file.
Personal and Family Projects
Photo slideshow discs, home video compilations, and handmade gift CDs are among the most common personal uses our team encounters. A printed insert transforms a plain disc into something that feels deliberate and considered. Family reunion videos, wedding highlight reels, and milestone birthday compilations all benefit from a custom cover that reflects the occasion. Our team has also seen teachers and small business owners use printed CD cases for training materials and product demos — a clean, labeled insert makes the whole package look organized and professional regardless of what's on the disc.
CD Cover Printing Myths Worth Clearing Up
A few persistent misconceptions about CD case printing keep circulating. Our team wants to address the ones we hear most often.
Only Special Printers Can Do This
This is one of the most common myths we encounter. Almost any modern inkjet or laser printer can produce a usable CD case insert — no specialized hardware required. Some printers handle photo paper better than others, and a dedicated photo printer will produce richer colors and finer detail, but the process itself is accessible with standard equipment. The software setup and paper choice matter far more than the printer model in the vast majority of cases. Our team has produced acceptable inserts on printers that cost less than $60.
Inkjet Prints Always Fade Fast
Inkjet technology has improved significantly over the past decade. Pigment-based inks — used in many current photo printers — resist fading for decades under normal storage conditions. Dye-based inks do fade faster when exposed to UV light, but a CD insert stored inside a closed jewel case sees minimal light exposure day to day. Our team's experience is that properly stored inkjet prints on quality photo paper hold up well over time. Using archival-quality paper and pigment-based inks removes the fading concern almost entirely for typical home storage situations.
Frequently Asked Questions
What is the exact size needed to print a CD case insert?
The front cover of a standard jewel case is 4.724 × 4.724 inches (120 × 120 mm). The back tray card measures approximately 5.906 × 4.625 inches. Our team recommends setting these exact dimensions in design software and printing at 100% scale — no scaling or "fit to page" — for the cleanest fit.
What paper type works best for CD case inserts?
Glossy photo paper in the 60–80 lb weight range gives the sharpest color and a professional feel inside a jewel case. Matte photo paper works for a softer, less reflective look. Standard copy paper produces noticeably flatter results and lacks the rigidity that helps an insert sit cleanly inside the case.
Does the printer need to support borderless printing?
Borderless printing is helpful but not strictly necessary. Adding a 0.125-inch bleed to the design and trimming carefully after printing achieves essentially the same result on any standard printer. Our team uses borderless printing when the option is available but relies on manual trimming with a craft knife and ruler when it isn't.
Can a laser printer produce a good-looking CD case insert?
Yes. Laser printers produce crisp text and solid color areas that work well for many insert designs. For photo-heavy artwork with gradients and subtle color transitions, inkjet on glossy paper typically delivers richer depth. Our team finds laser printing is a strong choice for designs built around bold typography, logos, and graphic shapes rather than photography.
What free software can be used to design and print CD case covers?
GIMP and Canva both support custom document sizes and are free to use. Our team's approach is to create a new document at exactly 4.724 × 4.724 inches at 300 DPI in either program, complete the design, and export as a high-resolution PDF or PNG before sending to the printer. Canva's template library also includes pre-sized CD cover templates that skip the manual setup step entirely.
What image resolution is needed for a sharp CD case print?
300 DPI at the actual print size is the minimum our team works with. Anything lower risks visible pixelation, especially in areas with fine text or detailed photography. Our team always checks source image resolution before placing artwork in the document — scaling a low-resolution image up to fill the space is the most common cause of blurry prints.
Is it possible to print both the front cover and back tray card on one sheet?
On standard letter paper (8.5 × 11 inches), the front cover and back tray card can fit side by side with some margin remaining. Our team typically prints them separately to simplify trimming and reduce the chance of misaligning one piece while cutting the other, but combining both on a single sheet works well with a careful layout and a steady hand with the trimmer.
How does printing a CD insert compare to printing full album covers?
The core process is nearly identical — correct dimensions, high-resolution artwork, appropriate paper, and accurate print settings are the keys to both. Album covers for vinyl records are considerably larger at around 12.375 × 12.375 inches, which pushes home printing closer to its limits, while CD inserts at 4.724 inches square are well within reach of any decent home printer. Our team covers the full process for larger formats in a dedicated guide on how to print album covers for anyone interested in that format.
Getting a CD case insert to look professional has nothing to do with having an expensive printer — it comes down to three numbers: the right dimensions, the right resolution, and the right paper type.


About Chris & Marry
Chris and Mary are a couple with a shared background in graphic design and print production who have spent years working with printers across creative and professional contexts — from art printing and photo output to label production and professional document work. Their combined experience evaluating printer performance, color accuracy, and paper handling across inkjet and laser platforms gives them a practical, hands-on perspective on what makes a printer worth buying. At ShopChrisAndMary, they cover printer reviews, buying guides, and recommendations for artists, photographers, and professional users.
Time to get FREE Gifts. Or latest Free printers here.
Disable Ad block to reveal all the info. Once done, hit a button below