Tracing paper is straightforward to use: place it over your original image, secure the edges, and trace the lines with a pencil or fine-tipped pen. Knowing how to use tracing paper correctly, however, separates a crisp, usable transfer from a smeared, misaligned result. Whether you are an illustrator, architect, crafter, or designer working alongside a photo printer to produce reference sheets, this guide walks you through every stage of the process — from selecting the right material to building a professional-grade archive of completed work.
Tracing paper has been a staple of technical and artistic workflows for generations. Its semi-transparent surface allows you to overlay an original document or drawing and copy outlines, patterns, or dimensions with high precision. Modern varieties range from thin layout bond to heavyweight drafting vellum, and your choice of paper determines everything from pencil grip to ink adhesion. Understanding which type to reach for — and how to handle it properly — is the foundation of reliable, repeatable work.
This guide covers the types available, a precise step-by-step method, the situations where tracing paper excels and where it falls short, best practices for clean results, and the storage habits that protect your materials over time. Work through each section before beginning a project; the context will save you both materials and frustration.
Contents
- Types of Tracing Paper: A Side-by-Side Overview
- How To Use Tracing Paper: A Step-by-Step Guide
- When Tracing Paper Is the Right Tool — and When It Is Not
- Creative and Professional Applications
- Best Practices for Accurate, Clean Results
- Storing and Caring for Your Tracing Paper
- Integrating Tracing Paper Into a Long-Term Workflow
- Frequently Asked Questions
- Key Takeaways
Types of Tracing Paper: A Side-by-Side Overview
Understanding Weights and Grades
Tracing paper is sold in weights measured in grams per square meter (gsm). Lighter sheets — typically 40–60 gsm — are transparent enough for quick sketching and layout work but tear easily under firm pencil pressure. Heavier sheets — 80–112 gsm — approach the durability of drafting vellum and accept ink pens without feathering. Your choice of weight directly determines which tools and techniques will perform reliably on a given sheet.
Drafting vellum occupies the premium end of the spectrum. It is more dimensionally stable than standard tracing paper, meaning it does not curl or stretch when humidity changes — a critical property for architectural and engineering drawings that must remain accurate over time. For casual crafting, standard tracing paper is entirely sufficient and considerably less expensive.
| Type | Weight (gsm) | Best For | Compatible Tools | Durability |
|---|---|---|---|---|
| Layout Bond | 40–60 | Quick sketching, concept work | Pencil, light markers | Low |
| Standard Tracing Paper | 60–80 | General illustration, crafts | Pencil, ballpoint, fine-tip pen | Moderate |
| Heavyweight Tracing Paper | 80–90 | Detailed linework, pattern transfers | Technical pens, markers | Good |
| Drafting Vellum | 90–112 | Architecture, engineering | Technical pens, ink | Excellent |
| Acetate / Mylar Film | N/A | Overlays, projection | Permanent marker, laser print | Very high |
Surface Finish and Tooth
The surface of tracing paper is described by its "tooth" — the microscopic texture that allows drawing media to adhere. Smooth-finish sheets favor ink pens and technical drafting instruments. Slightly textured surfaces hold graphite and charcoal more securely and are better suited to tonal rendering. When your project involves shading or rendering through the paper, choose a sheet with visible tooth. For pure line work, a smooth surface produces the cleanest result with the least bleeding or unintended spread.
How To Use Tracing Paper: A Step-by-Step Guide
Step 1 — Prepare Your Workspace and Materials
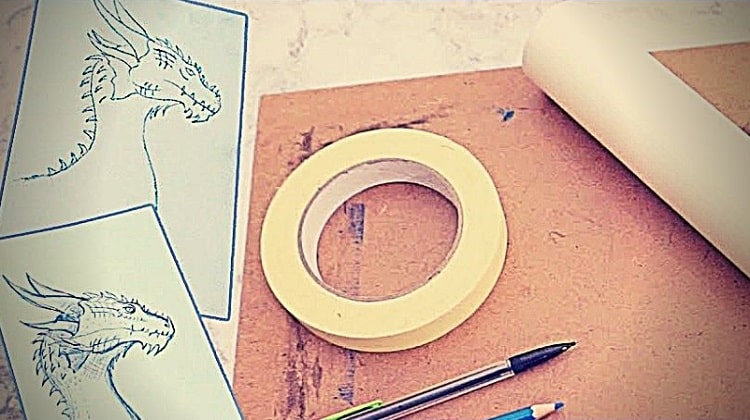
Begin by placing your original image or drawing on a flat, firm surface. A lightbox, a well-lit desk, or a glass-topped table with a lamp beneath works best. Secure the original with low-tack repositionable tape so it cannot shift during the tracing process. Gather your tracing paper, a sharp HB or 2H pencil for precision linework, a fine-tip technical pen for inking, and a ruler for any straight edges you need to follow.
If your original is a reference sheet produced by an inkjet printer, confirm the ink is fully dry before placing tracing paper on top. Fresh inkjet pigment can transfer under pressure and contaminate the tracing. For the sharpest line definition to trace from, a high-quality output on glossy paper provides excellent contrast and crisp edges.
Step 2 — Position and Secure the Tracing Paper
Lay the tracing paper over the original and align it precisely before taping. Place tape along two adjacent edges — typically the top and left — creating a corner hinge. This arrangement allows you to lift the tracing paper and check your progress without losing registration. Do not tape all four sides; the paper needs the freedom to expand slightly under your hand, and you must be able to inspect your work as you go.
Step 3 — Trace the Lines
Work from top to bottom and from left to right to prevent your hand from resting on completed lines. Apply light, consistent pressure — heavy pressure creates grooves in the paper that distort subsequent layers and may emboss the original beneath. Trace outlines first, then internal details, and leave fine texture or hatching for last. For curved lines, rotate the paper to bring the arc into a comfortable drawing angle rather than twisting your wrist.
If you plan to ink over pencil lines, allow the pencil layer to settle for a moment before applying ink. Use deliberate single strokes and avoid going back over wet ink lines, which causes feathering on all but the densest tracing paper grades.
Step 4 — Transfer the Image to Your Final Surface
Once the tracing is complete, flip the sheet face-down onto the destination surface. Rub the back firmly with a burnishing tool or the back of a spoon to transfer graphite to the new surface. Alternatively, place a sheet of graphite transfer paper between the tracing sheet and the destination and re-trace the lines — this method produces a cleaner impression and works on textured or porous surfaces. This technique is especially useful when transferring images to non-porous surfaces where direct marking is impractical.
When Tracing Paper Is the Right Tool — and When It Is Not
Situations Where Tracing Paper Excels
Tracing paper performs best when you need to replicate a design without altering the original, layer multiple drafts for comparison, or transfer a composition to a surface that cannot be drawn on directly. It is the preferred medium for iterative design work: successive sheets placed over earlier drafts allow you to refine lines, correct proportions, and evolve a composition without redrawing from scratch at every stage.
According to Wikipedia's overview of tracing paper, the material has been a standard tool in architectural drafting, fashion design, and cartography for well over a century — testament to its enduring utility across disciplines where precision and iteration both matter. The ability to discard a flawed tracing and start fresh without touching the original is one of its defining practical advantages.
Situations Where an Alternative Is Better
Tracing paper is not the right choice when dimensional accuracy over a large area is required without a lightbox — standard sheets shift under hand pressure and introduce cumulative registration error across a wide drawing surface. It is also unsuitable when the final output must be printed directly: most desktop inkjet and laser printers cannot feed tracing paper reliably through standard paper trays, and ink adhesion is inconsistent on its non-absorbent surface. For print-based workflows, scanning your traced artwork and refining it digitally before printing yields far better results than attempting direct machine printing on tracing paper.
Creative and Professional Applications
Fine Art and Illustration
Illustrators use tracing paper to refine gesture drawings, transfer compositions to watercolor board or illustration stock, and create multi-layer overlays that simulate color separation for print production. The material is forgiving: a wrong line costs nothing beyond a fresh sheet. For projects that ultimately move to a print workflow — such as producing edition prints on a precision photo printer — tracing is an efficient way to finalize a composition before committing to expensive final substrate.
Architecture and Technical Drawing
In architectural and engineering contexts, drafting vellum has long been the standard substrate for hand-drawn plans. Overlaid sheets allow designers to test partition layouts, mechanical runs, or structural elements without redrawing the base plan for each iteration. Even in an era of CAD software, physical overlays remain a rapid ideation tool in the early design phase, when the speed of hand drawing outweighs the precision of digital drafting.
Crafts and DIY Projects
Crafters use tracing paper to transfer embroidery patterns to fabric, duplicate stencil designs, copy quilt blocks, and scale decorative motifs. The graphite-rub transfer method works on wood, ceramic, and fabric — any surface that accepts a light pencil mark or chalk outline. For projects that combine printed graphics with hand-drawn additions, understanding how to print white text on transfer paper opens additional design possibilities that integrate naturally with a tracing-based workflow.
Best Practices for Accurate, Clean Results
Choosing the Right Drawing Tools
Pencil grade matters more than most beginners expect. An HB pencil is the standard starting point: firm enough to hold a fine point, soft enough to produce visible, transferable lines. A 2H pencil produces lighter marks for detailed architectural or technical work where line weight must be controlled precisely. Avoid anything softer than HB for tracing — the graphite smears readily and can contaminate the original document beneath the sheet.
For inking, use a technical pen with a 0.1–0.3 mm nib. These instruments deliver consistent ink flow without the capillary irregularity of brush pens or felt-tips, which bleed on thinner sheets. Always test your pen on a scrap piece of the same paper grade before committing to the final sheet. A single bleed line discovered mid-project is far more disruptive than a brief test at the outset.
Avoiding the Most Common Errors
Pro tip: Keep a clean sheet of plain copy paper under your drawing hand at all times — the oils from your skin accelerate graphite spread and cause ink to bead on all but the heaviest tracing paper grades.
Smearing is the most frequent problem when working with tracing paper. Work in a cool, dry environment when possible; humidity causes thinner sheets to cockle, introducing registration error that compounds across a large drawing. If a completed tracing accumulates smudges, press a kneaded eraser gently against the surface — do not rub, which stretches lighter-weight sheets. For ink errors, resist the temptation to use correction fluid; it adds localized thickness that shows through in overlaid layers. Start a new sheet instead — tracing paper is inexpensive enough to treat as expendable on any project where accuracy matters.
Storing and Caring for Your Tracing Paper
Storing Blank Sheets
Keep unused tracing paper in its original packaging or in a flat, sealed drawer away from direct sunlight and humidity. UV exposure yellows tracing paper over time and reduces transparency; moisture causes sheets to cockle permanently, making them difficult to lay flat for precise work. A flat file cabinet or a sealed map drawer is the professional standard for storing large-format sheets of any kind. Store rolls horizontally on a dedicated shelf or roll holder — standing a roll upright compresses the core and causes uneven tension and rippling when the paper is later unrolled.
Preserving Completed Tracings
Completed tracings should be interleaved with acid-free tissue paper to prevent graphite migration between adjacent sheets. Graphite transfers easily under pressure and will corrupt neighboring work within weeks if layers are stored in direct contact. For archival purposes, apply a light coat of workable fixative to completed pencil tracings before filing; this locks the graphite without sealing the surface permanently. Ink tracings do not require fixative but benefit equally from tissue interleaving.
If you need to archive a tracing digitally — particularly if the original document beneath it must be returned to a client — scan the sheet at 600 dpi minimum on a flatbed scanner. The resulting file preserves the linework faithfully and can be reprinted or edited at any point in the future. This is a standard practice in professional illustration and pattern-making studios where physical originals have limited lifespans.
Integrating Tracing Paper Into a Long-Term Workflow
Combining Analog Tracing with Digital Tools
The most productive modern workflow treats tracing paper as the analog ideation layer and digital tools as the refinement and production layer. You sketch and trace at the drawing table, scan the result, clean up lines in vector software, and output the final artwork on a precision printer. This hybrid method captures the speed and tactility of hand drawing without sacrificing the reproducibility of digital output. It is particularly effective for projects that involve revision cycles or client approvals before a final print run.
When your workflow extends into transfer-based textile or craft work — such as screen-printing fabric or applying decorative decals — knowing how to remove printer ink from paper to salvage misprinted reference sheets is a useful skill that complements your tracing practice and reduces wasted materials at every stage.
Building a Reference Tracing Library
Over time, a well-organized collection of tracings becomes a reference library: body templates for fashion illustration, floor plan grids for interior design, letterform guides for typography practice, or repeat pattern units for surface design. The key to a useful library is consistent labeling and indexing. Write the source document name, creation date, and intended use on each tracing in pencil before filing. Organize sheets by category and scale, not chronologically — retrieval speed determines whether the library actually gets used on deadline.
Treat your tracing library as a production asset. Flat files with labeled drawers, consistent sheet sizes, and a simple log sheet are the minimum infrastructure for a professional-grade reference collection. This level of organization pays dividends the moment a client requests a revision months after the original project closed, or when a recurring motif needs to be reused at a different scale.
Frequently Asked Questions
Can you feed tracing paper through a standard inkjet printer?
Most standard inkjet printers are not designed for tracing paper and produce inconsistent results — ink beads, smears, or fails to dry properly on the non-absorbent surface. If you need printed reference sheets for tracing, print them on standard paper and overlay the tracing paper by hand. Some specialist vellum products are marketed as printer-compatible, but you should test a single sheet before committing to a full run, as paper feed mechanisms vary significantly between printer models.
What pencil grade gives the best results on tracing paper?
An HB pencil is the standard recommendation for general tracing work: firm enough to hold a fine point and soft enough to produce visible, transferable lines. For precise technical or architectural tracing, a 2H pencil delivers lighter lines with less smearing risk. Avoid grades softer than HB — B and 2B grades smear easily and can contaminate the original document beneath the sheet, requiring you to clean or replace the source material.
How do you transfer a completed tracing to another surface?
Flip the completed tracing face-down onto the destination surface and rub the back firmly with a burnishing tool or the back of a spoon. The graphite on the underside transfers to the new surface, leaving a light outline ready to ink or paint over. For cleaner transfers — especially on textured or porous surfaces such as wood or fabric — place a sheet of graphite transfer paper between the tracing and the destination and re-trace the lines from the front. This two-sheet method is more reliable than direct rubbing when the receiving surface is uneven.
Key Takeaways
- Selecting the correct weight and surface finish of tracing paper — matched to your specific drawing tools — is the single most important decision before any project begins.
- Secure the tracing sheet with a top-edge hinge tape, work from top to bottom, and keep a barrier sheet under your drawing hand to prevent smearing throughout the process.
- Tracing paper integrates most effectively into a hybrid workflow: analog ideation and transfer at the drawing table, followed by digital refinement and precision printing for final output.
- Proper storage — flat, dry, and interleaved with acid-free tissue — preserves both unused sheets and completed tracings as reliable, long-term reference assets.


About Chris & Marry
Chris and Mary are a couple with a shared background in graphic design and print production who have spent years working with printers across creative and professional contexts — from art printing and photo output to label production and professional document work. Their combined experience evaluating printer performance, color accuracy, and paper handling across inkjet and laser platforms gives them a practical, hands-on perspective on what makes a printer worth buying. At ShopChrisAndMary, they cover printer reviews, buying guides, and recommendations for artists, photographers, and professional users.
Time to get FREE Gifts. Or latest Free printers here.
Disable Ad block to reveal all the info. Once done, hit a button below