Business & Professional Printers ›
How To Use a Router To Make Your Printer Wireless
by Chris & Marry
Want to know the easiest way to make printer wireless with router hardware you already own? The short answer: yes — you can do it without buying a new printer. A standard wired printer becomes a fully shared wireless device the moment you connect it to your network through the right setup. Every computer, phone, and tablet on your Wi-Fi can then send print jobs freely, without plugging in a single cable. In this guide, Chris & Marry break down exactly what you need, how to connect everything, and how to keep it running reliably long after the initial setup.
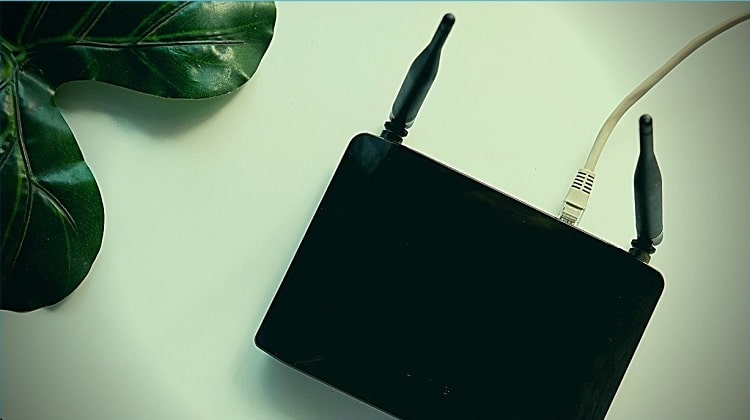
This isn't just for tech-savvy users. If you can plug in a USB cable and navigate a browser settings menu, you have everything it takes. The process runs about 15–30 minutes the first time, and once it's done, you'll wonder why you waited so long. The key is understanding what's actually happening behind the scenes — because that knowledge prevents the most common mistakes people make mid-setup.
If you've already experimented with cable-based printing from a mobile device, you know how close you are to a fully wireless setup. Our guide on how to print from an Android phone using a USB cable covers a related connection method worth knowing before you cut the cord entirely.
Contents
- Understanding How Wireless Printing Actually Works
- Everything You Need to Make Printer Wireless with Router
- Two Paths Forward: Basic Setup vs. Advanced Network Integration
- The Fastest Way to Get Wireless Printing Running Today
- Mistakes That Kill Your Wireless Connection (and How to Fix Them)
- Keeping Your Wireless Printer Reliable for the Long Haul
- Frequently Asked Questions
Understanding How Wireless Printing Actually Works
When you make printer wireless with router hardware, what you're really doing is connecting a traditionally wired device to your local area network (LAN). Once connected, your router broadcasts the printer's presence to every device on that network. Your computer sends a print job over Wi-Fi to the router, the router forwards it to the printer, and the printer executes it — no cable required between your computer and the printer.
This is fundamentally different from Bluetooth printing, which is a direct device-to-device connection capped at short distances. Network printing through a router uses your existing infrastructure, so range is determined only by your Wi-Fi coverage — not the 30-foot limit of Bluetooth.
The Role Your Router Plays
Your router acts as the central hub for this entire setup. It assigns the printer an IP address on your local network, and every device uses that address to find and communicate with the printer. Most modern routers support this natively — you don't need a specialized model.
Router features that make a difference:
- USB port on the router: Many routers include a dedicated USB port specifically for connecting a printer directly — no extra hardware needed
- Dual-band Wi-Fi (2.4GHz + 5GHz): Older printers often only connect on 2.4GHz — confirm which band your printer supports before setup
- DHCP reservation: Lets you lock in a fixed IP address for your printer so other devices always know where to find it
- AP isolation setting: Make sure this is disabled — it's designed for public hotspots and prevents local devices from communicating with each other
According to Wikipedia's overview of network printers, networked printing has been a standard office feature for decades. Consumer routers have now brought that same capability to home users at essentially zero extra cost.
Wired vs. Wireless: What Changes
The practical difference is simple: accessibility. A USB-connected printer serves one computer. A network-connected printer serves everyone.
| Feature | Wired (USB Direct) | Wireless (Via Router) |
|---|---|---|
| Device access | Single computer only | All network devices |
| Setup time | 5 minutes | 15–30 minutes |
| Cable required | Yes, permanently | No (after setup) |
| Connection stability | Always reliable | Depends on Wi-Fi signal |
| Best for | Solo users | Households and teams |
| Mobile printing support | Limited | Full (iOS, Android, Chromebook) |
Once you go wireless, printing from any device becomes as simple as selecting a printer from a dropdown. That convenience compounds across every person and device in your space.
Everything You Need to Make Printer Wireless with Router
Gather your tools before you start. Attempting wireless printer setup without the right hardware is the primary reason people stall halfway through and give up.
Hardware Checklist
Here's what you need on the hardware side:
- A printer with a USB port — if it isn't already Wi-Fi or Ethernet capable
- A router with a USB port, OR a separate USB print server (a small bridge device that adds network capability to any USB printer)
- A USB A-to-B cable — the standard printer cable; check that it's data-capable, not just a charging cable
- Your router's admin login credentials — usually printed on a sticker on the router itself
- A computer or phone to complete setup and run a test print
If your printer already has built-in Wi-Fi or an Ethernet port, you skip the USB print server entirely — just connect to your network directly. For a professional-grade printer built for networked environments, Ethernet or native Wi-Fi is often standard equipment.
Software and Driver Requirements
Hardware alone won't carry you to the finish line. You also need the right software:
- Updated printer drivers from your manufacturer's website — not the CD that came in the box
- Router admin panel access — typically at
192.168.1.1or192.168.0.1in your browser - Print server software — required if you're using a third-party USB print server; the manufacturer provides this
- Current operating system — Windows 10/11, macOS Ventura or later, or up-to-date mobile OS
Driver settings directly control output quality and behavior. If you print on specialty media like photo paper or glossy stock, our guide on how to print on glossy paper shows exactly how driver configuration affects the final result — the same driver panel you'll work with after going wireless.
Two Paths Forward: Basic Setup vs. Advanced Network Integration
Not everyone needs the same depth of configuration. Your situation — home user, small office, or multi-device team — determines which path fits best.
The Plug-and-Print Method
This is the right approach for most home users and small offices. Two options fall under this category:
Option A — Use your router's built-in USB port:
- Plug the printer into the router's USB port with a standard cable
- Log into your router's admin panel
- Navigate to USB settings and enable print server mode
- Note the printer's network address shown in the panel
- Add the printer on each computer using that address
Option B — Use a dedicated USB print server:
- Connect the print server to your router via Ethernet
- Connect the printer to the print server via USB
- Install the print server's software on each computer
- Run the detection wizard to find and add the printer
Both methods deliver the same end result. Option A costs nothing extra if your router supports it. Option B costs $20–$60 for the hardware but works with virtually any router on the market.
Full Network Integration
If you manage multiple devices, run a home office, or want centralized print queue control, go further:
- Assign a static IP address to the printer via your router's DHCP reservation table — this prevents "printer not found" errors caused by rotating IPs
- Use IPP (Internet Printing Protocol) for cross-platform compatibility — works natively across Windows, macOS, iOS, and Android without any proprietary software
- Set up a dedicated print server on a spare computer or NAS device for queue management, usage logging, and priority settings
Static IP reservation is the single highest-impact configuration step for long-term reliability. It takes two minutes in your router admin panel and eliminates the most common wireless printer complaint.
The Fastest Way to Get Wireless Printing Running Today
Here's the practical sequence. Follow these steps in order and you'll have wireless printing running before your next break.
Setting Up via USB Print Server
- Unbox the print server and connect it to your router using an Ethernet cable
- Plug your printer into the print server's USB port
- Power on both devices and wait 60 seconds for initialization
- Install the print server software on your main computer
- Run the detection wizard — it scans your network and identifies the print server automatically
- Add the printer using the network path the wizard provides
- Print a test page to confirm everything is communicating correctly
If the test page prints successfully, you're done. Add the printer to your other computers and devices using the same network address.
Setting Up via Your Router's USB Port
Not every router supports this, but those that do make setup remarkably clean:
- Confirm support — check your router's manual or admin panel for a "USB storage" or "print server" section
- Plug the printer into the router via a USB cable
- Log into the admin panel at
192.168.1.1or192.168.0.1 - Enable print server mode in the USB settings section
- Note the printer's network address displayed in the panel
- On Windows: Settings → Bluetooth & devices → Printers & scanners → Add a printer → "The printer I want isn't listed" → Add a printer using a TCP/IP address
- Enter the network address from step 5 and follow the prompts
Once it's added on one device, every other computer and phone on your network can add the same printer using the same network address. For detailed navigation through the Windows printer settings interface, our guide on how to print photos in Windows 10 covers the same settings panel you'll use to confirm your printer is recognized.
Connecting Your Devices After Setup
After the printer is live on your network, adding it to other devices takes under a minute each:
- Windows 10/11: Settings → Bluetooth & devices → Printers & scanners → Add a printer
- macOS: System Settings → Printers & Scanners → Add Printer → choose from the discovered list
- iPhone/iPad: AirPrint detects compatible printers automatically — no manual steps
- Android: Mopria Print Service (built into most Android 9+ devices) discovers network printers automatically
- Chromebook: Settings → Advanced → Printing → Printers → Add printer → enter IP address
If your printer supports AirPrint or Mopria, mobile setup requires zero configuration. Your phone finds the printer on its own the moment they're on the same network.
Mistakes That Kill Your Wireless Connection (and How to Fix Them)
The setup process is logical, but a handful of easy-to-miss errors trip up even experienced users. Know them before you start.
Network Configuration Errors
- Wrong Wi-Fi band: If your router broadcasts 2.4GHz and 5GHz under the same network name, your printer and computer might land on different bands. Separate them into distinct names or manually assign devices to the correct band.
- Skipping IP reservation: Dynamic IPs rotate. Your printer's address today may be different after your router restarts, triggering "printer not found" errors. Reserve a static IP in your router's DHCP settings — this takes two minutes.
- AP isolation enabled: This router feature prevents devices on the same network from communicating directly. It's useful on public hotspots but breaks home printer sharing completely. Disable it.
- Firewall blocking print traffic: Windows Defender or third-party security software sometimes blocks local network communication. Add a firewall exception for your printer's IP if print jobs disappear without error messages.
Driver and Compatibility Issues
- Using a generic driver: Generic drivers often allow basic printing but cut off advanced features. Always download the full driver package from your printer manufacturer's website for your exact model number.
- Outdated drivers after OS updates: Major Windows or macOS updates break driver compatibility regularly. After any significant system update, check your manufacturer's support page for a new driver release.
- Architecture mismatch: Installing a 32-bit driver on a 64-bit system causes silent installation failures. Confirm your system type before downloading.
If you're working with HP hardware specifically, our guide on how to print on card stock with HP printers walks through the HP driver settings panel — the same interface where you'll verify driver version and printer status after going wireless.
Keeping Your Wireless Printer Reliable for the Long Haul
Getting it working once is step one. A wireless printer that performs perfectly on day one can start dropping connections within weeks if you skip ongoing maintenance. These habits keep it running smoothly.
Firmware and Driver Maintenance
- Update your printer's firmware whenever new versions are released — manufacturers push fixes for connection stability, security vulnerabilities, and compatibility improvements
- Update your router's firmware every 6–12 months — outdated router firmware is a common but overlooked cause of device connectivity drops
- Reinstall printer drivers after major OS updates — treat every major Windows or macOS upgrade as a clean start for your printer software stack
- Check compatibility notes when upgrading your printer — newer firmware sometimes changes how the device announces itself on the network, which requires re-adding it on each computer
Network Best Practices
- Reserve a static IP in your router's DHCP table — this single step eliminates the majority of long-term "printer disappeared" complaints
- Restart your printer weekly — embedded print server firmware benefits from a clean restart, just like any networked device
- Position the printer within strong Wi-Fi range — thick walls, concrete floors, and interference from appliances degrade signal over time; physical placement matters more than most people realize
- Use a mesh node or Wi-Fi extender near the printer if your signal is marginal — weak signal produces slow print jobs, dropped connections, and incomplete pages
- Monitor your router's connected devices list periodically — if the printer drops off and reconnects on a new IP, it's a sign you need DHCP reservation
Managing print settings consistently across a wireless connection becomes much easier once your setup is stable. Our guide on how to print on both sides of paper for HP printers covers the duplex settings that a reliable wireless connection makes straightforward to control from any device on the network.
Frequently Asked Questions
Can I make any wired printer wireless with a router?
Yes — as long as your printer has a USB port, you can connect it to a network using either your router's built-in USB port (if available) or a separate USB print server. The only exception is very old printers with proprietary connection ports, which may not have compatible adapters.
Do I need a USB print server, or is the router's USB port enough?
If your router has a USB port and explicitly lists "print server" in its feature set, that's enough — no extra hardware needed. If your router lacks a USB port or doesn't support print server mode, a dedicated USB print server ($20–$60) is the reliable alternative that works with any router.
Why does my printer keep losing its network connection?
The most common cause is a dynamic IP address — your router reassigns a new address to the printer after each restart, and your devices can't find it. Fix this by reserving a static IP for the printer in your router's DHCP settings. Also check that AP isolation is disabled and that your printer is connecting to the correct Wi-Fi band.
Can I make printer wireless with router and still print from my phone?
Absolutely. Once the printer is on your network, iOS devices use AirPrint to find and use it automatically. Android devices use the Mopria Print Service, which is built into most modern Android phones. Both protocols detect compatible network printers without requiring you to install any additional apps.
How do I find my printer's IP address after connecting it to the router?
Log into your router's admin panel (usually at 192.168.1.1 or 192.168.0.1) and look at the list of connected devices — your printer will appear there with its assigned IP. Alternatively, most printers can print a network configuration page from the control panel that displays the current IP address directly.
The only thing standing between you and a fully wireless printer is a USB cable you haven't unplugged yet — and now you know exactly what to plug it into instead.



About Chris & Marry
Chris and Mary are a couple with a shared background in graphic design and print production who have spent years working with printers across creative and professional contexts — from art printing and photo output to label production and professional document work. Their combined experience evaluating printer performance, color accuracy, and paper handling across inkjet and laser platforms gives them a practical, hands-on perspective on what makes a printer worth buying. At ShopChrisAndMary, they cover printer reviews, buying guides, and recommendations for artists, photographers, and professional users.
Time to get FREE Gifts. Or latest Free printers here.
Disable Ad block to reveal all the info. Once done, hit a button below